Thursday, November 5, 2015

Gymnastics short (which became a gymnastics skirt)

I don't like just leotards by themselves. I don't like seeing panties stick out around the leg holes, I don't like seeing them do splits and such in them...I want more coverage, but I know they need to be able to move around and have something that's stretchy to stretch with them.

I couldn't find the shorts I was looking for (of course, when I'm willing to pay, I can't even find what I'm looking for...except online, but what if it doesn't fit?)
So, I decided to sew them.

I still prefer shorts, but one of my twins asked for hers to have an attached skirt, so I altered the plan.


For the 2nd pair (purple), I used a pair of biker shorts to make my pattern.
(We call them "legging shorts" because they wear them under skirts and dresses like you would leggings, but not for show, for coverage when they are being kids).

I probably could have just told them to wear the legging shorts as gymnastics shorts, but they looked funny and the older girls are already 'short' on shorts - and I couldn't guarantee the pair they needed would be clean on gymnastics day.

Anyways - enough talk - this isn't intended to be a tutorial b/c I don't have time for that right now. It's just pictures to show my process. If you just need a little nudge worth of instructions, this should help.

Settings on my serger that worked best while sewing these:
 (I have a Janome very basic low cost serger)

Inner leg seams
 Ready to sew crotch seam
 Pin to keep seams aligned
 Crotch seam done - I almost always sew the seam then serge in case I need to adjust anything and so things don't move around.
 Once you serge, it's essentially permanent
 Shorts ready for seam and waistband
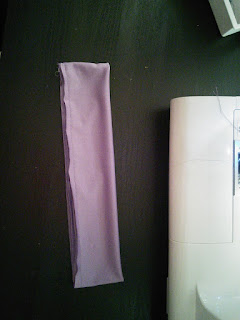
 Waistband (14" long folded, so 28" wide and about 5" tall)

 Serge edges (right sides together)
 Serged leg bottoms
 Flipped waistband right side out
 Folded in half (so seam is hidden in fold)
 Sew along bottom cut edges (baste)
 Then serge them
 Why are my pictures out of order?? Back to shorts - used twin stretch needle to hem shorts.
(I couldn't get the seam not to "tunnel" where it bumps up between the rows of stitches, but whatever!) A skill I'll work on later.
 Picture of the twin needle in case you need to sew what to shop for. I only use it to hem knits really, so it's lasted a while. (I probably should get a back up for in case this one breaks mid-project, but I expect it to last a long time and not wear out like my other needles do because I use it so little.)
 Circle skirt - there are a bazillion tutorials on how to measure and plan these, so I won't go into that.
(I think my measurements were about 4" down and then 10" down? Don't quote me on that...your measurements will be for your waist and your waistband.) Ideally, the circumference of the small circle will be the same as whatever the waistband of your shorts is.

Formula for circumference (the measurement around a circle - in this case, the side of the inner "donut"):
C = 2 x pi x r 
(r is the radius of your "inner donut" - the measurement from that folded corner to where the paper begins)

Pin it at the sides, back, front, and half way in between those to evenly space the skirt onto the shorts.
Sew on (right side of skirt and right side of shorts both facing up)
 Do the same pinning with the waistband onto the outside of the shorts/skirt (raw edges together)- front and back, then sides, then eighths.
Then sew, stretching either the waistband or the skirt as needed to align them.
 I sewed it on then serged it all.
 Flipped up
 Sewing directly onto elastic keeps it slightly stretched out, so I wrap the elastic around my child's waist and then make it a little tight. Cut it and sew it into a loop.
 Once last time with the pinning in 1/8's around the skirt.
Sew it on (I start at the back by the way) - zig zag stitch - narrow enough to fit on the elastic (1/4")
  You will have to stretch the elastic as you sew - this is good and will keep the skirt tight so it won't fall off.
 Elastic sewn right onto serged seam allowance. (the waistband is flipped down so you can see/get to the seam allowance)
 Flip the waistband back up and it's done.
 Finished skirt - still need to get a pic of her wearing it.
 Here's my other daughter wearing the skort I made for her.


Wednesday, September 2, 2015

Kids craft area - will it stay organized?

 I'd like to add some non-carpet mat under the craft area. I was also hoping to turn the table coming out the wall vertically, but the table was too shaky that way. (It would have fit 4 at a time instead of 2) - at least this way all the stuff attached to the wall is closer to the table.

Craft stuff that needs some effort required to get down. (hopefully this will deter it getting into the wrong hands)


Desk Area

The kids got all the old stamps my mom and I collected from the 1990s through current...which neither of us use anymore. After the kids got ink stains in the carpet right after they brought all the stamps home, I UNauthorized them until I give them a "stamp class" to learn how to properly use stamps and ink....and maybe until after I protect the carpet too!

Baskets from dollar tree - with laminated printed labels tied on with ribbon

Buckets from IKEA labeled with return address labels printed on and stuck on the inside of containers

Our "re-purpose box" (Where old cans, boxes, paper towel tubes, etc go to be used for whatever)...
There is no guarantee the craft made from these will survive more than a month!

The oldest 3 got this for Christmas a year and a half ago and barely got to use it before we packed it up to list the (previous) house, so when they kept coming into my room and using my  machine (and leaving my sewing table a complete wreck), I decided it was time to unpack theirs and set it up officially. Not the most comfortable table...but we'll work on that. I haven't found anything I like yet for their sewing table.

And some (dollar tree) hooks on a nearby attic access door for aprons.


I really hope they keep it organized. And if they don't, I'll just take away the things that are most messy. One more look...

Wednesday, July 22, 2015

Like mother, like Daughter

Earlier this week I decided I'm taking a week off from summer kids' activities because I need to sew!

My 10 year old came in and watched me work a while on Monday afternoon (I'll post my project when I'm done with them all) and then asked if she could have my scraps. She always wants them...little pack rat...but never makes anything from them.

Later that evening, she asked if I could help sew up the opening and get the ears on tighter because her stitches didn't work and she needed help. I'm not sure what I expected to see, but it wasn't an almost completed project!I had no idea she'd even been sewing? She had even used my sewing machine...need to teach clean up post-project next!

 I showed her how to finish it (and my part looks worse than hers! - my excuse is the terry cloth didn't give me much room for a blind stitch so the nose is crooked.)


I asked her how she did it and she said she found a pattern online and followed the instructions (using things from the allowed scraps baskets). I thought, By yourself!?!? I was so surprised. I guess when you want to create, you figure it out!

Here's where she found the pattern and instructions:

(I don't think it's meant to be made from terrycloth, but it worked just fine.)

She calls him Pipsqueak.

Monday, June 29, 2015

de-upholstering and re-upholstering: Chaise Lounge

Wow, this was so much harder than I expected - and confusing - and expensive.
This is probably my first and last project like this! 

I have done simple things before. In fact, I did one in under an hour earlier this week:


But this was so much more work - I so underestimated this project. 
My best resource was www.diyuphosterysupply.com
I bought most of the stuff I needed from there.
They have videos (on their website and YouTube) that were so helpful.
(As were the books I got from the library and other YouTube videos.)

I bought the foam earlier on amazon.
I bought the fabric from fabric.com 
(diy upholstery supply has fabric and foam too, I just went with what costed less or what I wanted in style)

These are just pictures so you can see our journey...

Then, we stored it a while so that I could research and purchase everything I needed

Then, we got to work - it took 2 full days of my husband and I working together using all of our skills and brains.

Edge Roll (Fox roll) - nice support (probably should have put a smaller size on the arms as it was hard to get staples through that later in the process!)


cotton batting (1 layer on back and arms, 2 layers on seat)
(pulled back to do arms first, then back, then seat)

(next step - dacron - already on arms)

then dacron on arms only (like quilt batting but thicker)
1 layer here, but added a 2nd layer only on top before fabric


Then foam (3")


 Turned out to be easier to "saw" with open scissors than to cut. (We didn't have ALL the correct tools since this was a one time thing - and electric kitchen knife would have worked on the foam - I've used it before, but I don't have one of those now.)


Can we be done now??


 Then dacron on the seat and back to hold down the foam all tucked in. (1 layer)


Then, started the fabric on seat and back first. (I wish we had covered everything in some thin muslin or something before the fabric b/c the dacron shredded on everything.)


Time's up for the day...until tomorrow.


Next the inner and front arms (those were tricky)! I followed the way the chair had been done the last time, but I could have done the inner and outer arms and left the front arms for last and made some cardboard covered thing to cover the staples on the front. Instead, the front is attached to the inner and all folded to the outer arm, which is stapled down at back and bottom (leave the front edge of the outer arm needed hand stitching or decorative tacks).


 The back wasn't as hard as I thought - the flexible metal tack strips with covers made it so easy.
Wish I had realized the outer arms needed something like that too and bought them for that spot also.


Dust Cover (cambric) was so easy to put on - I did that part alone


Done...mostly. (Maybe I'll add a picture of the side after I replace the stick pins with tacks)...so I guess it's still on my list until it's 100% finished!

One more look: