Showing posts with label family. Show all posts

Tuesday, June 14, 2016

72 Hour kits - the food

Back in April and October, around the first week (General Conference time), we rotate our 72 hour kits. Mostly just the food. (The other things don't need much rotation - occasionally, we'll update the medicines and the kids clothes get rotated down as they grow.)

Usually, my husband and I handle the rotation and the figuring out what I need to buy. Then, I do the shopping (trying to think of ideas for the things we rotated out and no one would eat). We work together to unload all 7 bags (with 3 food bags each) and reload those 21 food bags back into the 7 backpacks. We've tried to include the kids before, but instead of it being a learning experience, it was just chaos.

This year, I decided to do that with the kids...results would be uncertain. But they are older (ages 6 to 13) and hopefully could handle following directions this time?

How it went:
My husband and I had already distributed each person's bags around the table and evaluated what needed to be replaced. (I purchased these things and and had them available before the kids and I did the rotation.)

  • Everyone sat around our big table and unloaded their food bags in front of them.
  • We pulled out all food that was already expired or that would expire before our next rotation (6 months later). Some things get rotated every 6 months, other things last longer.
  • These soon to be expired foods went to the center of the table.
  • Then we went through each type of item (poptarts, crackers, fruit, "main dish", etc) that I had bought and replenished each person's piles.
  • We checked the dates of each item in their kits and each child wrote on a notecard what would need to be replaced next time. (This will make creating a shopping list easier - I can shop without having to unload all the bags first.)
  • Everyone loaded into bags and containers what was supposed to be in each.
  • Bags and containers went back into the backpacks, zipped up, and done.


Our menu: (for each day)
Breakfast - 1 pack of (2) poptarts
Snack - 1 can of fruit (canned, plastic containers sometimes spoil before 6 months is up)
Lunch -  vienna sausages (for my kids. We have soup), crackers* & PB (no PB for me)
(*sometimes I buy those filled crackers, "nabs" by dad used to call them, lance is a popular brand now)
Snack - granola bar or fruit/grain bar or rice krispie treat
Supper - Canned dinner (pasta, beef stew, spaghttiOs, etc)

I list 2 snacks, but in the actual time of eating, those could be eaten as part of one of the 3 meals instead. We change the food from time to time depending on what the kids are willing to eat and how much things cost and what "convenience foods" there are available that season.

----I've never done anything that couldn't be eaten right out of the bag before (because I wanted to be prepared for being in an evacuation facility without the ability to cook), but I decided to throw in ramen this time because it's something I know my kids will eat, and if nothing else, maybe I could convince them to eat it like a crunchy snack?

----The biggest thing in selecting food that will last at least 6 months and is something I know my family will eat! Not only for if it's needed, but also for when it's rotated in 6 months.

Rotate every time: poptarts, granola bars, cereal bars, rice krispie treats, crackers (ritz, nabs/lance, any kind)

Everything else rotates at date. (If it expires in March and my next rotation is in April, it gets pulled out and replaced. If it lasts until May, I'll rotate it out in April.)

 And we all get a big water bottle per day. (Also have a canopener in each bag, spoons, and wet wipes.) I won't go into all the other non-food, but these are related to food items.

Right now, this is how we pack it. Things that squish easily are put into old containers (like yogurt containers, sour cream containers, anything that holds its shape). Things that have a hard container (like a metal can) or like ramen that is better smashed anyways just go in a bag by day. (Day 1, 2, and 3) The things packed in yogurt containers have 3 of each item, so we just know it's 1 per day of these things.

I've bought a gallon plastic container with a twist on lid and I'm going to see if I can fit everything squishable into that and if it is better for space.

There are hundreds of ways to do 72 hour kits and hundreds of opinions on what to include. I'm posting this to be another idea out there that might help someone trying to find ideas on what to buy or how to store it.

Monday, February 3, 2014

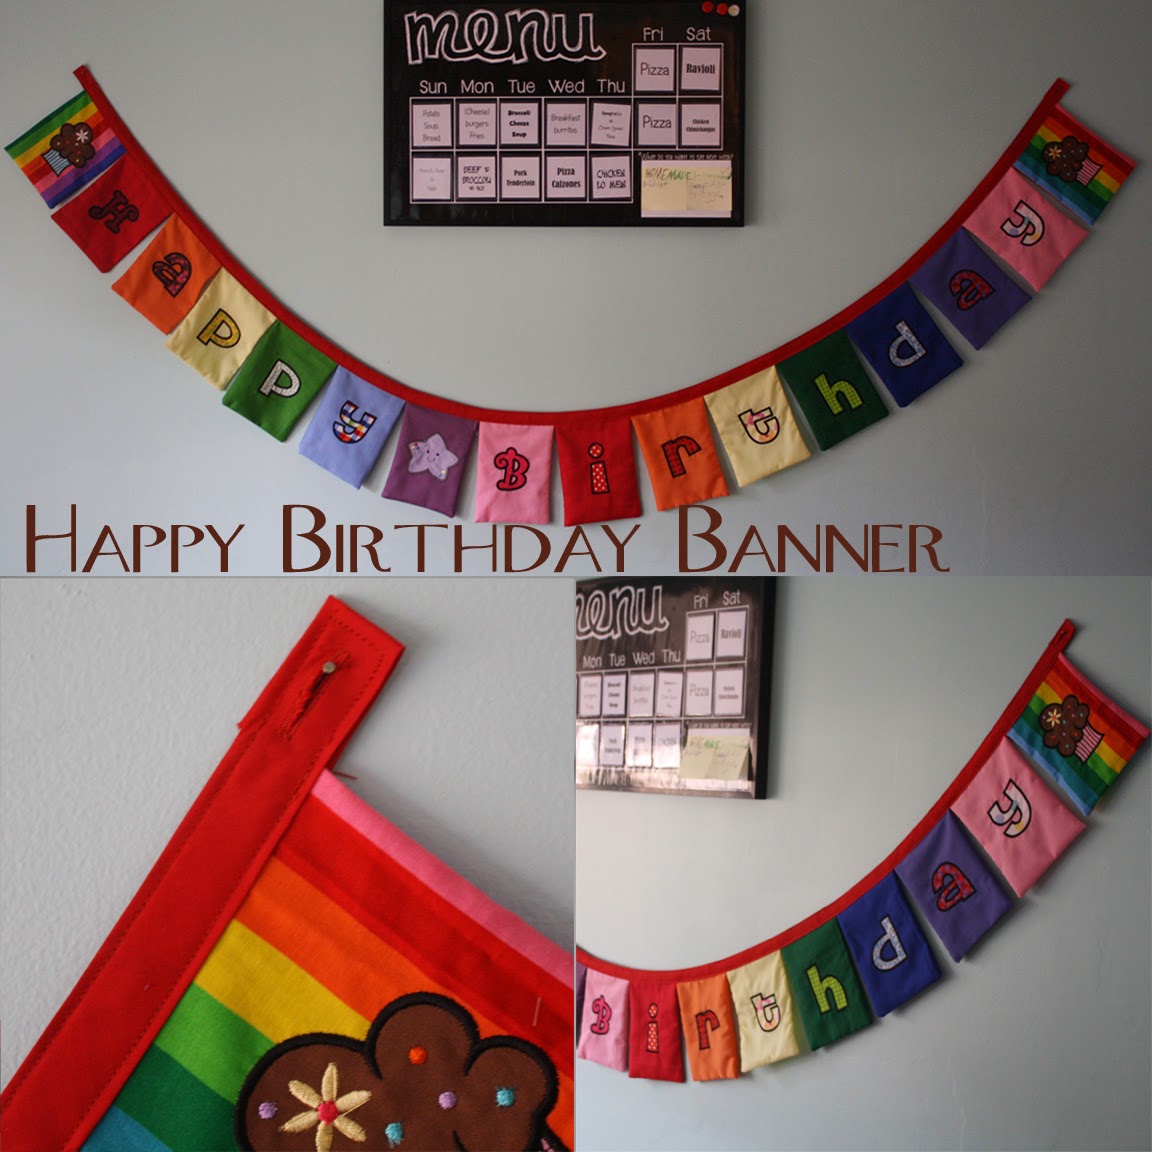
Happy Birthday Banner


Finally - after having a lot of these fabrics bagged for several years, I finally got around to doing this project!

It was an idea I think my mom saw someone else make for their house and told me about. I loved the idea of a durable reuseable birthday banner, and not wanting to make one every time I had a different color scheme (or a different child's favorite color birthday), I decided to go rainbow theme. 


I have mostly girls (and my one son recently had a party, so he won't be due for another 4 years...plenty of time to do something else - or nothing at all because teenager boys don't have decorated parties, right?) ;)
Plus, the next three parties (girls of course), I have in mind themes that would be perfect for rainbow.


I used my embroidery machine to applique each letter on a scrap of fabric. Then I sewed a backing/lining (right sides together and flipped of course), leaving the top open. I thought about top stitching around each of the finished rectangles (about 5"x7" finished), but I would have had to fight with clear thread or keep changing my thread or have white stitching around each rectangle and I didn't want any of those.


Then, I just sewed them all touching into a length of extra wide double fold bias tape. (It only took 1 3-yard package, with some leftover.)


I put buttonholes in the ends to make it easy to hang from whatever.


Cute, right? 
(And I used all stuff I had in my leftovers box or general supplies, like thread. So, it wasn't free, but it "felt" free!) :)

Oh, I should post my updated menu board. (Too bad I left my kids' tacky request postits up for this picture!) oops. Anyways -  I really like my new method for the menu board! I'll try to remember to do that next and not make you wait another 4 months for a post!

Monday, July 22, 2013

An Attempt at Summer Productivity

I have realized that I barely keep up with the blog during the school year...
during the summer? yeah right :)

But we haven't been sitting around doing nothing...we also haven't gotten done my wonderful, well planned and thought out summer plans for fun.

Here's a sneak peak into some of our summer stuff this month:

To make hairstyle choices easier, I printed picture of hairstyles to make a "menu" with a $1 photo album.

(We don't do fancy hair every day - most days it's a pony tail, but when I have time/energy, they love to pick one from the book or request a new one from their own head or online.)


 My youngest wanted to make butterflies to hang from her ceiling. (At 3, I was impressed she could come up with her own idea for crafting. But in the end, we found cute butterflies at the dollar tree and hung those.)
I do have a limit to my how much kid-craft I decorate my house with.

My older girls (8 and 6) did make some of the same style with me (nylon over wire) - like the ones we bought with mostly supplies we already had - I only spent $1 on a pair of pantyhose.
 Cute - but they're not hanging from the girls' bedroom ceiling. :) What should we do with them?
(note - If you do this you need REALLY strong craft wire - flimsy wire does not hold its shape very well...hence the reason our nylons are not stretched tight)

In the end, I consider it a success because I learned how to dye tights with food coloring - a useful Halloween skill. :)

I also made an attempt at a swim top. It was also a success (it's cute), but there are a few things I learned in the process that will make next time (yes, there will be a next time) :) a little smoother going.
Most of my tips for figuring it out came from here (lots of tips)

My son has been working on his artist badge  (and various others all summer) for Webelos


 And my husband armed the 8 year old with a hand saw to make my request for bathroom drawer dividers


 (I'll post the complete details later...maybe...) :)

 And I just liked this picture from our beach trip of a random bird on the beach. :)

Happy summer! Enjoy the kids. 
(and save the great ideas for the school year) :)

Monday, June 10, 2013

summer chart 2013

And so our summer vacation begins (school ended last week around here)...

Last year I made a calendar for June and July out of posterboards. Each day was labelled with an activity (handwritten) on a little piece of cardstock - with a hand drawn picture to match. (Some were rough...working on my art skills here!) :)


First, we had a countdown to summer chain - each day was labelled with the date and what was going on that day. They took turns cutting them off.


 off to the side of the calendar were posted these: (I think the drive in movie got added on the 27th later - I'd have to go back and check my calendar?)


But by July I was getting tired and the house was getting awful....
By August, I was DONE. 
They still asked every day, "What's the activity for today?" 
The activity is getting ready for school later this month!

I really liked the idea of a daily activity, but when the weather was too hot or we were tired or the house needed cleaning or errands needed to be run or I felt obligated to show up at the gym I was still paying for (well, I still am this year, but I don't care this summer)....the 'daily activity' sometimes got pushed to the next day and it would stress me until we completed it.
.     .     .        

Long story short - 
This year, I knew I needed to plan the fun but also list our 'normal life' along side it with room for more organization and planning. 

We'll see at the end of summer if this is over planning and what parts I want to keep for next summer! (Every summer I try something new - I had a few rejected ideas this year I may try next year.)

This year's summer chart:

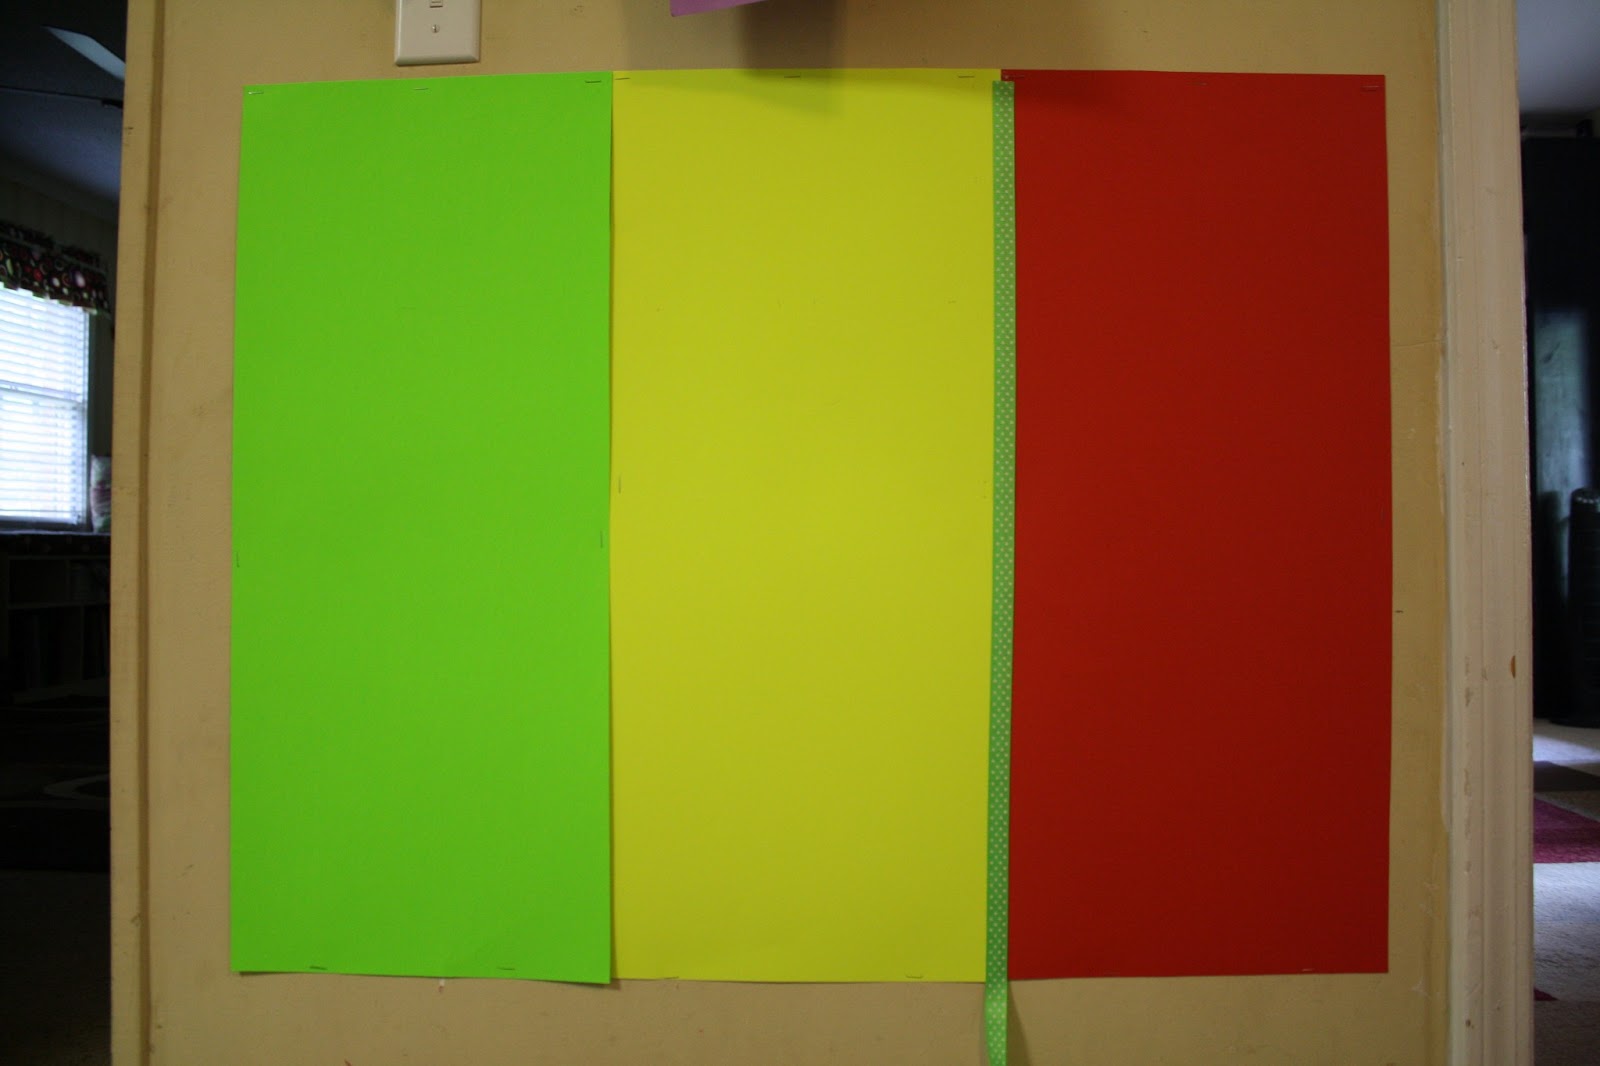
I started with posterboard and cut three bright SUMMER IS HERE kind of colors to make it about 24x36 
(I relocated this later - which was a pain, but don't let the pictures confuse you.)

I stapled it right to the wall. (They're easy to take out and the holes are tiny that they leave.)
I covered the "seams" with ribbon and the border - the ribbon got glued down since the posterboards are temporary, unlike the wall. :)

I decided to use frames for two of my charts so I could write/erase as needed.

I did hang them "through" the poster, but when I relocated it, I also just hot glued them in place. (They're from the dollar tree...it was worth the $2 not to have them move all summer.)

And my months are smaller, but labelled with a weekly THEME rather than daily activities and the details of the week will be determined the week of.

That way if I'm busy or something comes up, I can alter the activities around that. If I have more time than we thought, I'll add something in.

I have activities in mind (some pinned on Pinterest, some in my head, some the kids have requested)...I just listed them on notecards under the heading for each week so I can remember my ideas when we get there.

And then, I added that to the board under the calendars so I don't lose them!

A closer look at my stuff....just in case anyone wants to use it too.

 I doubt this one will help anyone as it's got my kid's name on it, but the general idea might help someone...or you can just laugh at my over scheduling (which already failed on the first day as shopping for our 2-week grocery run took well past 11 am.) Ah, the joys of grocery shopping with 5 kids at multiple stores. :)
 It's not a super strict schedule, but more of an outline...and if we get behind, then something will have to be dropped...something fun.
"Choose a room sticks" means all the common areas will be on jumbo popsicle sticks and they randomly choose one and that is the room they have to straighten before Dad gets home from work. The 3 year old will get automatically assigned the hallway/foyer because it's the only one she's capable of doing without step by step instructions.
 Here's hoping this altered summer chore plan will work out better than last year's. :)
Chore sticks are jumbo popsicle sticks on the chore chart (pockets for each child) and labelled with specific chores that need to be done each week - like "vacuum girls room" or "organize dress up" or "clean playroom floor"...some are gender specific - like only the girls will have to vacuum their room - most are generic.
And just to make this even more longer :)

My themes this year:

One with Nature
(cub scout camp, nature crafts, whittling, pool time)

Head over Heals
(cartwheels and other acrobatics, hair flips/twists/braids, etc)

Framed
(photography basic lessons with my point-and-shoot)

Freedom Fun
(anything 4th of July related, red/white/blue - food, incl making homemade pvc weapons, outdoor movie)

Just beachy
(trip to visit my parents...at the beach)

Please pass the peas
(lessons in the kitchen on basics like homemade bread without machines, etiquette, making aprons, finishing in a dinner party to have a game about the Word of Wisdom - our law of health - and practice good manners...this passes off a requirement in my kids' booklets to earn their Faith in God award at church)

a stitch in time
(quilting, family history field trip)

Game on!
(classic indoor/outdoor games - marbles, checkers, hopskotch, cards, etc)

A day in the life of a kid
(good old kid stuff - learning to blow bubble gum, sleepovers, water fun, etc...last fling)

Reliving the memories
(scrapbooking, journals, video, maybe even a game of charades based on things we did...etc.)

Not all of those ideas will happen I'm sure and I may think of more...but that's why I didn't ink them on cardstock on use permanent scrapbook tape this year for my calendar! :)

Tuesday, April 2, 2013

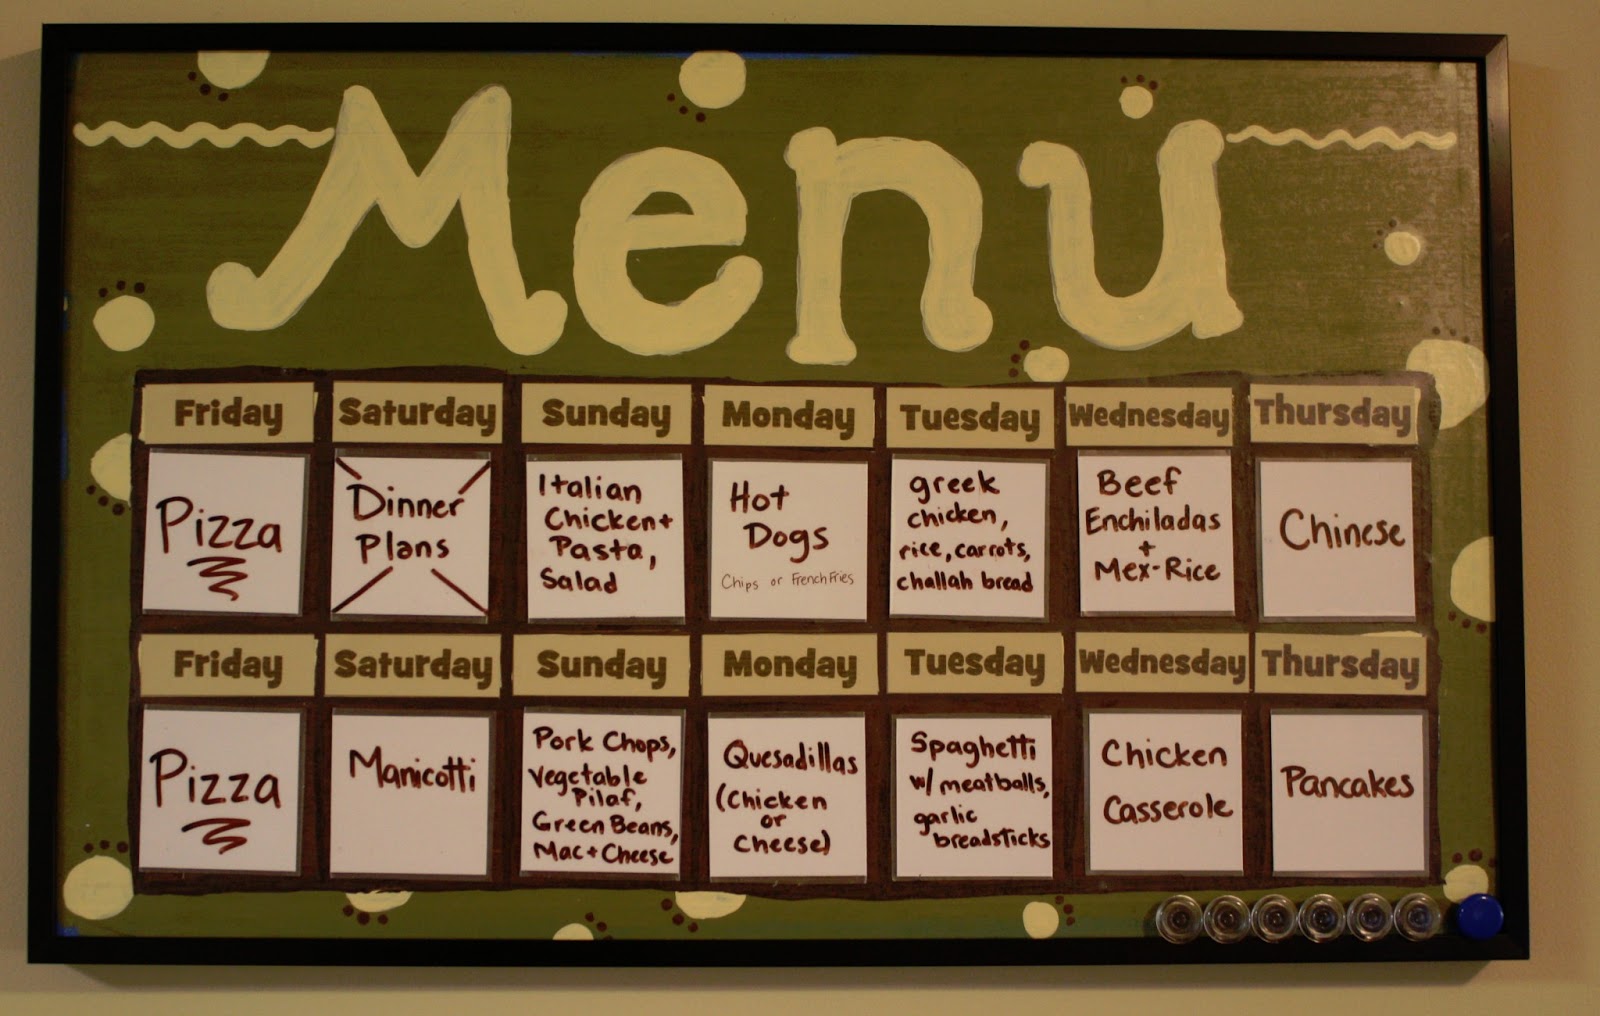
Our First Menu Board

I say "first" because I'm going to edit it this year - it has some flaws that I don't like, but overall, it has been great for the past year since I made it and tried it out.


It was an idea that never got out of the back of my head and into real life until last year when I wanted to make some office things for my father in law (who had just started working from home) -

FIRST - Grandpa's Birthday presents:

I wanted grandkids in his office space but still useful.

So, one drew a picture, I spray painted a frame and we turned it into a to-do board. 
(My oldest was instructed to use light colors so that he could see his list):


The other project was a magnetic board - for posted whatever he wanted.
My 4 girls each had a hand in this (the frame was also sprayed to match the first) - and their final picture (once dry) was covered in clear contact paper to protect the art work.


Now, the Menu Board creation begins!

I had bought the frames from goodwill and the sheet of metal from Lowes - so I had to cut the metal down to fit the frame - leaving me with this piece of metal leftover.

I measured it out and (leaving a border), divided the space into 7 equal squares - with a small rectangle on top for the days of the week - leaving me space at the top for a title.


Note - metal is kind of a pain to paint on with acrylic paint. Next time, I will either make a poster, print it out through some service and adhere it to the metal...or spray paint it with some metal-friendly paint before painting my own design on top. 

Also note - permanent marker is hard to cover up with paint - it takes many layers!

I drew a rough sketch of what I wanted, painted the borders - roughly (and for some dumb reason the word "menu" sketched), then painted the backgrounds of each space.

Then, I went back and painted the borders of the calendar space to give it straighter smoother lines.

I gave up after several attempts at painting the days of the week and printed them out on cream colored cardstock and glued them in place.


The entired surface was covered in clear contact paper (again to protect the paint) and then framed.

Because of the strange size (I think 15x24?), it took me a while to figure out what I would do for a frame - then I found at hobby lobby frame pieces (metal) that you buy individually and put together. (The pieces all together = $20 for the frame - more than I wanted to pay - I was hoping for goodwill, but not bad, as everything else was leftover from previous projects, except some paint for under $2)

(Michaels had them in their clearance section later last year...I almost bought more just to keep on hand for a menu board gift, but I resisted the urge to clutter up my craft stash!) :)


The menu items are written on pieces of poster board (I buy it from the dollar tree and cut it up, but you could use cardstock) - then covered in clear contact paper and a piece of magnet sheet glued on the back.

What I like about it:
  • I can change around the menu without erasing/re-writing or drawing arrows all over my menu paper
  • The pieces are magnetic so it looks more picture-like and permanent
  • As I have added new meals to the recipe box, it gives me a list of meals to choose from during my too-tired-to-think weeks.
  • It holds 2 weeks worth of meals (which is how I shop - 1 paycheck at a time)
  • cute handmade look (imperfections expected and liked)


What I will change when I edit it:
  • The menu items will be slipped into sleeves with magnets so I don't have to keep buying new magnets
  • blue painter's tape protecting sharp edges didn't get completely painted/covered (oops)
  • The week will be rearranged to fit two weeks of meals starting on Friday but be shaped more like a standard Sun-Sat calendar:


And when I make that edit, I will re-post so that you can see the modified version, but for now, this works great. 
(And for now, I've also quit buying magnets and just use little circle magnets on top of the posterboard squares when I want to make a new meal.)


Tuesday, February 26, 2013

Family Home Evening Chart Ideas


Our first:
The first FHE chart we had I started at a relief society activity - I was really excited to make it since it reminded me so much of the one my family used growing up.

I didn't actually finish the chart that night, but I had taken 6 "heads" (although I only had 1 child at the time...I may have even been pregnant with him?) and I finished it at home later...my own way.

I decided I wanted the heads to stay put so we could be in order and I didn't actually get around to finishing the chart until I had 2 kids, so the bottom two circles were just painted and left blank until the twins were born a few years later.

I bought the little wooden pictures from Michaels to represent the different things we wanted as part of our FHE - I tried different things at different times, so I stuck the extras onto the back with more velcro so we could edit our 'agenda' from time to time. (The family's hair is made using embroidery floss I had in my stash.)

Our various parts (we used only 6 of these at a time):
  • Welcome (obviously, "welcome")
  • Prayer (opening or closing, sheep)
  • Song (I had a note at some point?)
  • Activity song (hand)
  • Lesson (book)
  • Activity (behive or pencil)
  • Treat (cupcake)
  • Talent (star)
  • Article of Faith (bee-leaf...get it? belief.)

Our current:
Then, we had another kid, and I wanted a new chart...so I finally got around to making one. "Just in case" (and to accommodate guests for FHE), I added an extra spot on this chart for a total of 8. We leave the "?" at prayer until we have a guest over. We used to rotate ? and whoever had the welcome could do both or I came up with that part (?) for FHE.


I (machine) embroidered these designs onto fabric, then sewed on 8 clear vinyl pockets (the vinyl squares have brown satiny ribbon folded over the cut edges before being sewn onto the fabric) - I didn't put a lot of forethought into placement since I was new to embroidery, so the pocket placement isn't perfectly even, but (surprisingly) this doesn't bother me.

Blank, it looked like this:

When I added the letter circles, the bottom bunched a little from the weight, 
So I added another dowel in the bottom (I didn't want to undo my side seams to make a casing between the layers, so I just folded the bottom up around the dowel and stitched it in place then re-inserted the dowel.)


To  make the circles, I saved the lids from 8 can of (del monte) spaghetti sauce and covered them with fabric that had been embroidered with the initial of a family member. I used hot glue and I glued a circle onto the back to cover the edges of the front circle. They have held up nicely. 
My only regret is the font I used...the kids had to get used to the way their letters looked.

This time I  made the placement of activities fixed (so the "welcome person" - conducting person - knows where to start and end) - and the family rotates around.

Our current agenda:
  • Welcome
  • Opening Song
  • Opening Prayer
  • Lesson
  • Activity (movement) song
  • Article of Faith (which we also sing - all together)
  • Fine Arts/Talent
  • Closing Prayer

We move straight down the middle - the initial circles alternate sides of that middle agenda.

We decided treats weren't necessary to FHE - if we want a treat, we'll call it dessert and eat it when we eat dinner - it made the bedtime routine flow smoother.

And in a few years when the kids get older and we don't need a wiggle song or they all know all the articles of faith, I'll probably edit it again and make a new one. :)