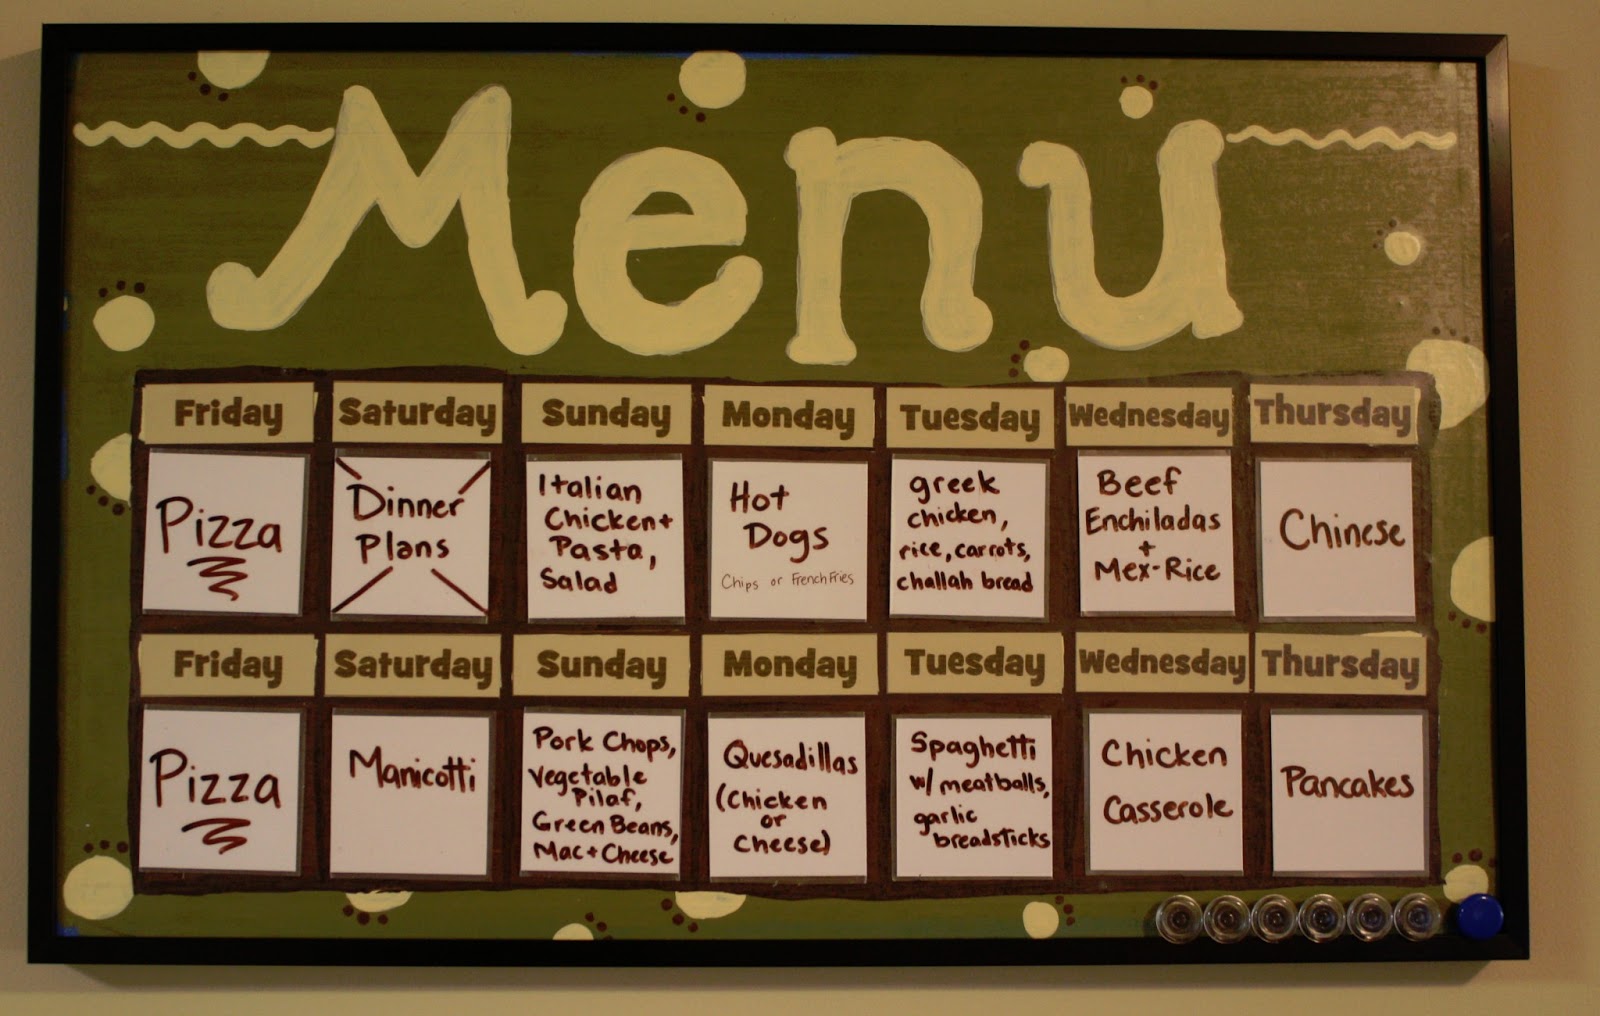
We love it and use it regularly. It gets rotated every other week; I know what the meals are left I have to work with and can move around as needed. Everyone that comes to my house also loves it and some ask how I made it. And every time I realize I still haven't posted how I did it. I can't believe I haven't posted this one yet! (I rarely post anyways, but this one should have been a priority.)

My Original: Menu Board 1.0

When I made it, these were my Menu Board Requirements:
- Menu cards that could be moved around easily (writing a list for the fridge or dry erase didn't work)
- 2 weeks worth of meals - starting on a Friday (b/c that's the day I shop for most of the food)

Eventually, I realized, that wasn't going to work unless we ate the same handful of meals over and over again. (And some families do, but we don't.)

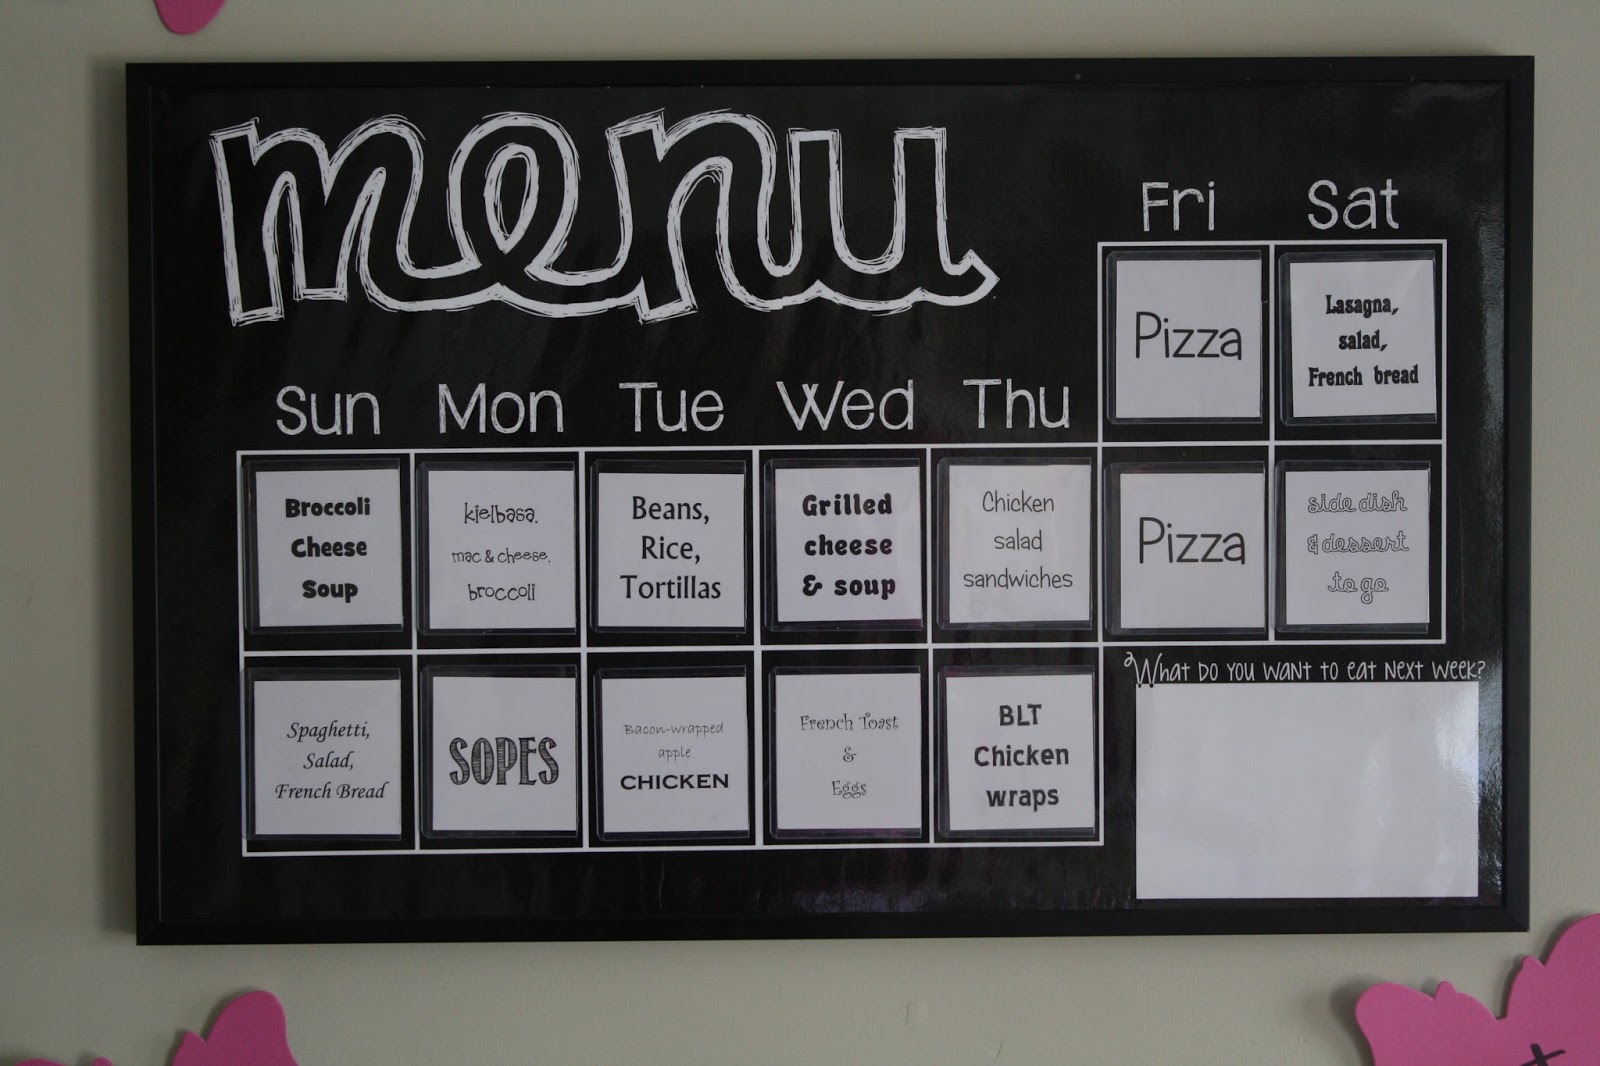
- (still) easy to rearrange meals
- (still) Friday to Thursday 2 weeks
- Week layout is more standard (Sun-Sat)
- Cards can be made quickly and cheaply and PRINTABLE
- (still) magnet backed
- Only uses 14 magnets (1/day rather than 1/meal)
- More professional looking (not crooked paint job!)
And we love it! So much so that I am now making my 2nd gifted menu board!
Here is one I made for my sister in law:

Here is one I made for my other sister in law:

Ready to make one yourself? Let's go!

First- supplies for the board (and where to get some of them):
- Large frame (at least 20" wide, 24" wide is better - any height)
- Magnetic sheet metal. (Lowe's; I recommend 24" wide)
- Download one of my printable file... Or Computer skills
- Large print of menu board on paper (office dept, FedEx, etc)
- Lamination of menu paper (same as printer or educational supply store)
- Tin snips (Lowe's, etc) , optional
- paint, optional (for frame)
Supplies for the cards and where to get them:
- Individual Baseball card holders, rigid plastic (one per meal on board = 14 for me) (Amazon)
- E6000 epoxy glue (Walmart)
- Magnet sheet (enough to put about 2" x 2" square on each card holder) (Walmart)
- Index cards (3x5")
- Index card box

(cut into 3x4 grid to get 12 magnet pieces from 5"x8" magnetic sheet)
Additional commentary on supplies:
Frame and Metal:
I tried thrift store frames (which I've used for other projects), but for these, the timing didn't work out - but poster frames or backless frames (from hobby lobby or michaels) work well here.
I like to paint thrift store frames I use for projects.
The sheet metal needs to be at least as big as your frame. Find it in lowe's or home depot in a section that looks like this:

My sheet cost about $11.

And not all sheet metal is magnetic. Take a magnet or grab one off the row that sells magnets to test each sheet before you buy.

The leftover piece will probably get trashed. (I don't really feel like trying to flatten it out and put a gash in my hand. My craft and cooking record is prone to injuries. Hence, my husband cutting this for me.)

You can trim to size with tin snips. (We got some with my first sheet metal craft, so cutting to fit whatever frame I find is my preferred method. Note: Thin metal is easier to work with, like 22-26 gauge.)

Alternately, you could buy sheet metal first and then buy a frame to match size from a retail store. Hobby lobby and Michael's have these frames you buy in pieces so you can create any dimensions you want. (I had to do that with my menu board because the sheet of metal was leftover from another project and there was no frame on earth that size.)
Menu printable
*All of these will fit the menu cards/holders as described below but some are a tight fit and some have more margin around the card holders within each day.Here are ones I've made:
The first style is for a 10x20" frame and just changes out the picture in the corner.


This next set is 15 x 24" frame with different fonts and b/w coloring options
.jpg)
%2Bcopy.jpg)
%2Bcopy.jpg)
%2Bcopy.jpg)
%2Bcopy.jpg)
This last set is for a frame that is 18 x 24"


And one more size in case you happen to have it 16"x20"

(Those are all jpg - and if you click on them, you are welcome to download them and use them.)
For your own size or style, use Microsoft publisher, word, Adobe Photoshop, or whatever you're comfortable with to make your own. (Or send me a message --{ incredibeth (at) gmail (dot) com }-- and I can draw one up for you!)
You'll need to print out your design and laminate:
To print one designed on the computer, I use office depot. They accept .pub, .doc, .pdf, .jpg, etc and will print and cut to size. Black and white is cheap. Color... not so much. (Other places like FedEx are similar.)
(It cost me $1.50 to print 18x24 black and white print.)
To laminate it... Your home laminator probably isn't wide enough, if you even have one.
Office depot and FedEx and most places that print will also laminate things for you, but the educational store right around the corner from an office depot is cheaper here.
(The educational store is about $3 to laminate this, office depot is about $6 - one of these times it was raining and so I just laminated it where I printed it and paid the extra $3.)
I stick with black and white, but you could also design it on computer, print in black and white, color it with art supplies, and laminate it afterwards. Be creative.
Once you've got the pieces, it's easy! Put the laminated menu paper on top of sheet metal and put it in the frame.
Next we'll do the menu cards.
Once you make the card holders you can make hundreds of meal cards for minimal cost. (And that was my goal in version 2.0)
For the menu card holders, you'll need rigid baseball card protectors. I find them on amazon. (I'm not sure if the "super thick" packs would hold the cards without slipping so I get standard sleeves.)
Here's a link to a few on Amazon and a picture in case those links all break one day.
Ultra Pro Baseball Card Holder Sleeves

This is the part where measurement is important. I'll explain what I do and leave you to decide your plan.
I print 2 meals on the blank side of a 3x5" index card, side by side.
I trim along the red line on the other side to make it shorter so that it fits in a baseball card holder sideways.

Then I cut the index card in half. (I have all the baseball card holders trimmed to fit half an index card sideways.)

Every time I have a new meal (well, 2 meals), or even a slight modification to how I wrote it previously, I just print out a new index card.
For the card holders, I measure or just insert a meal card sideways - trimmed to less than 3" x 2.5" (half of a trimmed index card) - and leave a border of plastic to match the sealed edges of the card holder. Then i trim the excess.

Once you have them cut smaller (cut off the end with the opening! Not down the side or bottom.), all that is left is gluing a magnet on the back.
I like flat magnets, like magnetic sheets or magnetic cards (size of business cards) or even those magnetic vent covers from hardware stores!
If the magnet doesn't have adhesive (or if the adhesive fails), to adhere the magnet I use e6000 epoxy glue.

The reason I do the cards/holders this way is because I wanted something I could print lots of meals over time and not have to re craft another couple cards every month forever. I also didn't want a fail meal to be a waste of a magnet. So I decided to use index cards. They almost fit sideways in the baseball card holder and are too tall, so leaving either as is didn't work.
So I modified. I like it almost square.

If you want to design your board to fit full size baseball card sleeves, go ahead. You'll need to print on sheets of cardstock and cut meal card to fit sleeve. Maybe you can find a different clear plastic sleeve that fits some card size you have?

I hope this was easy to understand. It's certainly easy to make and easy to modify for fitting what you find. And it is so nice to have meals planned and to be able to move and reschedule that menu as necessary! And the kids actually prefer! looking at the board to see what's for supper instead of asking me.