Showing posts with label quick. Show all posts

Monday, July 22, 2013

An Attempt at Summer Productivity

I have realized that I barely keep up with the blog during the school year...
during the summer? yeah right :)

But we haven't been sitting around doing nothing...we also haven't gotten done my wonderful, well planned and thought out summer plans for fun.

Here's a sneak peak into some of our summer stuff this month:

To make hairstyle choices easier, I printed picture of hairstyles to make a "menu" with a $1 photo album.

(We don't do fancy hair every day - most days it's a pony tail, but when I have time/energy, they love to pick one from the book or request a new one from their own head or online.)


 My youngest wanted to make butterflies to hang from her ceiling. (At 3, I was impressed she could come up with her own idea for crafting. But in the end, we found cute butterflies at the dollar tree and hung those.)
I do have a limit to my how much kid-craft I decorate my house with.

My older girls (8 and 6) did make some of the same style with me (nylon over wire) - like the ones we bought with mostly supplies we already had - I only spent $1 on a pair of pantyhose.
 Cute - but they're not hanging from the girls' bedroom ceiling. :) What should we do with them?
(note - If you do this you need REALLY strong craft wire - flimsy wire does not hold its shape very well...hence the reason our nylons are not stretched tight)

In the end, I consider it a success because I learned how to dye tights with food coloring - a useful Halloween skill. :)

I also made an attempt at a swim top. It was also a success (it's cute), but there are a few things I learned in the process that will make next time (yes, there will be a next time) :) a little smoother going.
Most of my tips for figuring it out came from here (lots of tips)

My son has been working on his artist badge  (and various others all summer) for Webelos


 And my husband armed the 8 year old with a hand saw to make my request for bathroom drawer dividers


 (I'll post the complete details later...maybe...) :)

 And I just liked this picture from our beach trip of a random bird on the beach. :)

Happy summer! Enjoy the kids. 
(and save the great ideas for the school year) :)

Tuesday, March 19, 2013

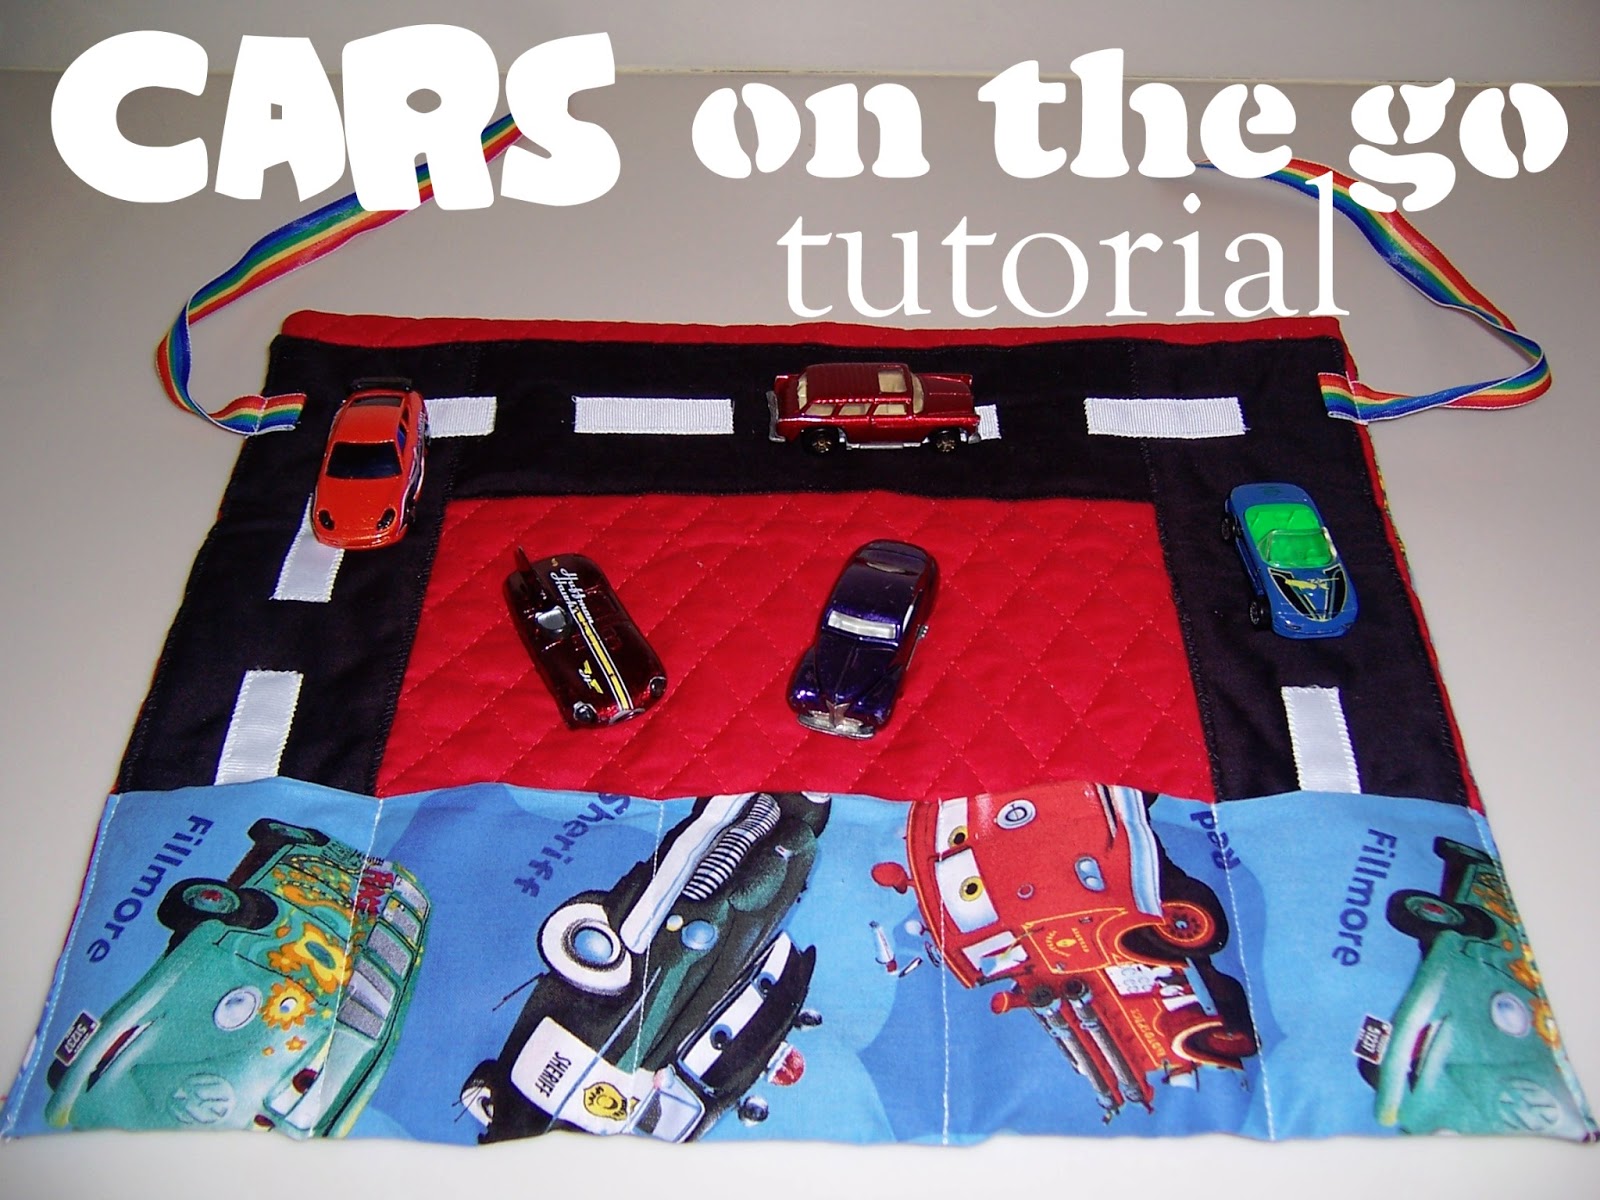
Cars on the Go

Today I'm posting a cute idea - and there's still time before Easter for this quick project!

This isn't my great idea for a project, but from my mom. :) She made this for my nephew (her grandson) for a quiet toy. Perfect for any boy who loves cars and can be entertained by them for a while - and it wraps up neatly to fit right in your bag.

untie it and open it flat...


Unroll it...
and play!
I love the little "garage pockets" for the cars to "park" when it's time to roll it up and clean up!

Here's how to make it:

Materials:
1/2 yard print fabric (Cars fabric here)
1/2 yard quilt fabric (red fabric here)
1/2 yard black fabric
Grosgrain ribbon- 5/8 inch white
Grosgrain ribbon 5/8 inch colored for ties
thread (black and white)

Directions:

Cut quilt fabric 13 inches by 16 inches

Cut print fabric 21 inches by 16 inches ( I cut the 16 inch edge on the selvage - this avoids having to finish the edge inside the car pockets)

Cut black fabric:
(2) 7 inch by 9 inch 
(1) 7 inch by 11 inch


Cut white ribbon in 2 inch strips (these will be for the 'lines' on the road)


Fold black fabric in half right sides together, and stitch 1/2 inch seam allowance, leaving 1 side open.  Turn and iron flat.


(raw edges will be covered when we sew the road on)

Pin on to right side of quilt fabric.  1/2 inch in from edge of fabric on sides and top, put raw edge side under finished edge as you pin around.  Sew down on quilt fabric.  (A zig zag stitch will provide the best security)


road sewn down:
 back of fabric:


Place white ribbon strips in middle of black fabric for road lines.  Use tiny zigzag stitch to sew down strips.


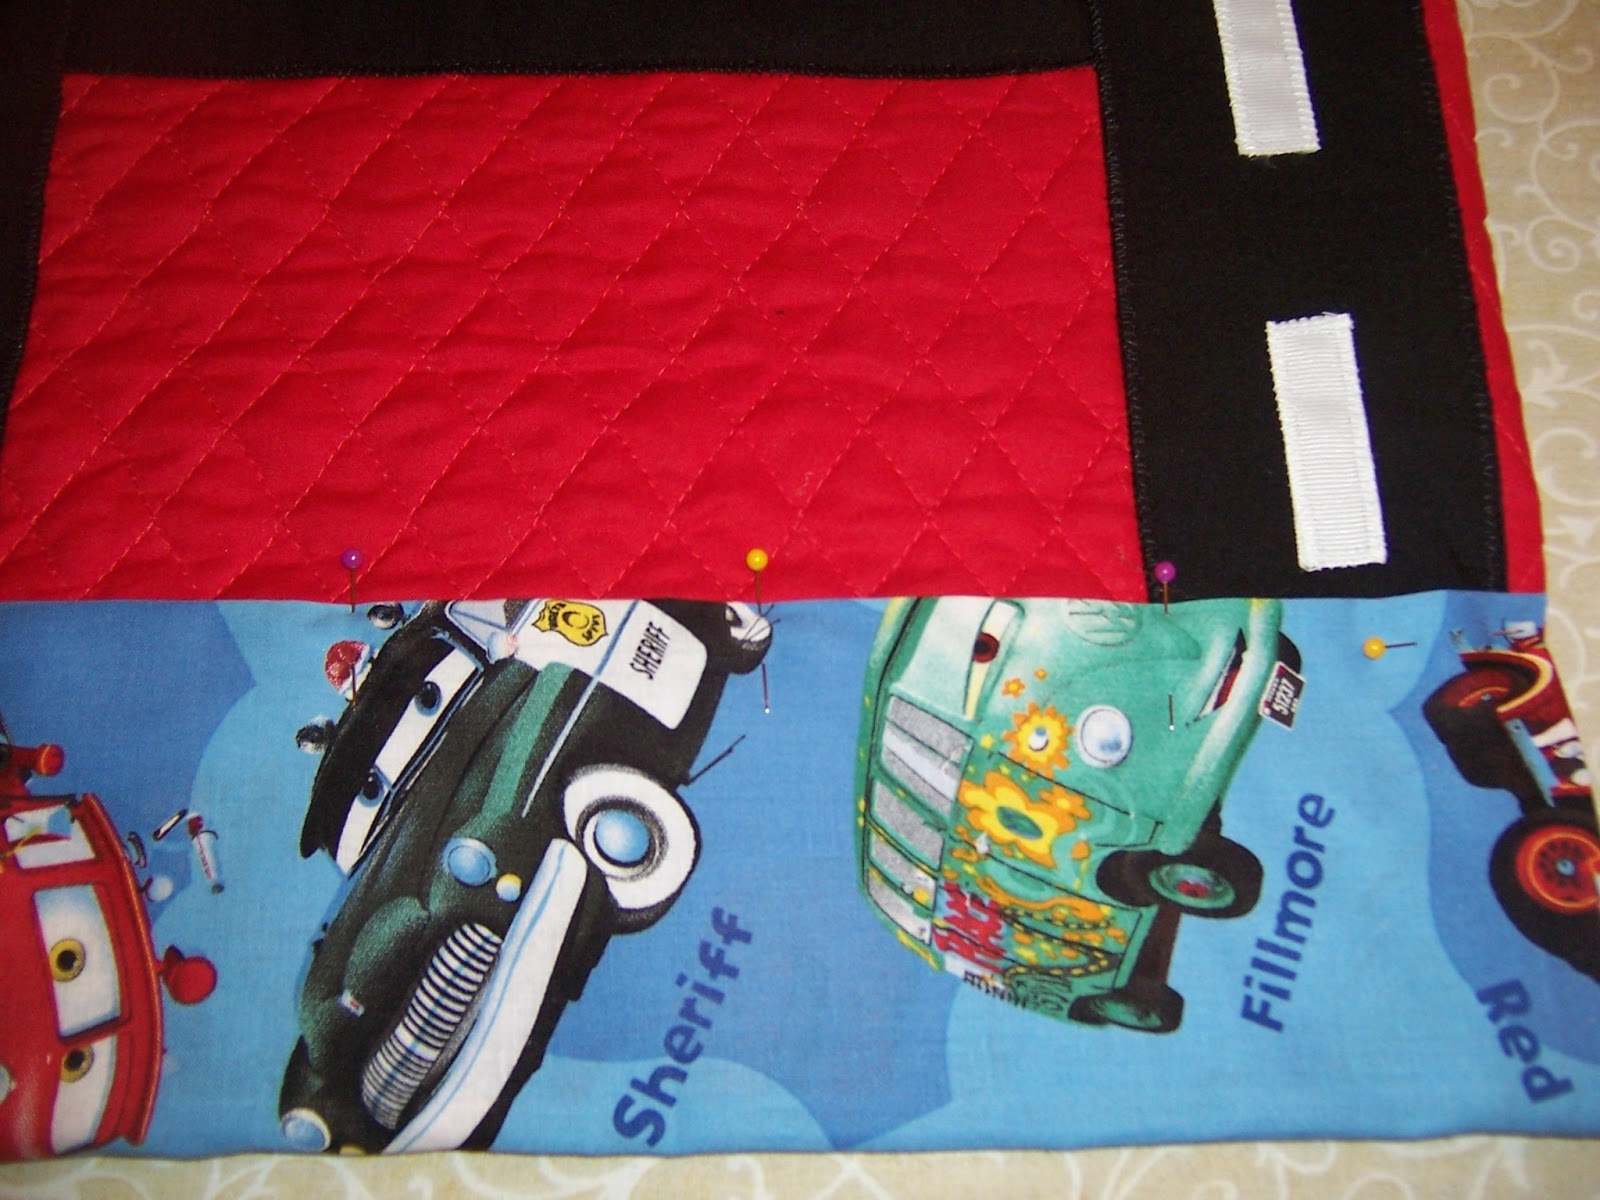
Fold print fabric up 4 inches, wrong sides together. Iron in place/ pin in place.  (This will be for the outer part of the car pockets later - it will be folded up again to complete the pocket.)

*If you cut your 16" side along a selvage, this is where you want the selvage to be used.


Put right sides of print and quilt fabric together- the folded edge of print fabric will be longer at bottom.  
(Road is the right side of quilted fabric - the long side of quilted fabric that does not have a road piece should be positioned towards the extra of the print fabric.)

  
 Sew from edge where folded piece meets quilted edge sew up one side, across top and  back around to where folded up edge meets bottom of quilt fabric. 

Clip corners (get ready to turn right side out)  

  Turn to right side. (Fabric extension showing, road section is hanging off opposite edge of ironing board)
The print fabric extension should naturally fold along the sides where the seam allowance continues toward the selvage of this piece (see picture below)

Fold up print fabric (along the crease that was made before sewing these two pieces together)

 Flip up print 4 inch piece again onto the bottom edge of quilted fabric.  (This creates the pocket for the cars)

Pin every three inches, and sew along side edges and at where the pins mark to create pockets for cars.


Sew colored ribbon on each edge for tying up car mat for storage.  


Tuesday, February 12, 2013

2013 - Valentines - Hang Around - Clothespin

Another year of "what can I do that's cheap for valentines but that's something they can have?"...and doesn't involve candy (per our district's "no candy" policy)....I'm posting early this week in case you need a valentine project to throw together before Thursday!

 I've got 5 kids, that's 20+16+18+19+3 = 76 valentines to buy or make! and I don't like to give just a little card from some pre-made pack of character valentines from the store. (I know, I complicate my own life.) :)

Found an idea for various clothespin crafts, so I took a spun on those for our own valentine. 
Here it is all wrapped up:

We painted clothespins (right now they have a 36 pack at the dollar tree - most of mine came from a 100 pack from walmart for some low cost). And let them dry overnight.

For my 3 year old's preschool group (there are only 4 kids, including her), I printed out little hearts with the other kids' names on them - onto pink cardstock. When the "big kids" get home from school today I'll probably have them handwrite names into the hearts.


To "laminate" them, fold a piece of clear packaging tape over the heart and then trim around (leaving about 1/8" border of clear tape to protect the heart). I glued them on with hot glue (that part I will do for all the kids...except my 8 year old daughter who will probably insist she can do it without getting burned)...


Add a magnet piece on the back (this one's cut a little big) - it doesn't take much.
(and I have a big roll since the dollar packs of magnetic adhesive strips were out of stock)...
more projects for later. :)


Ta-da! A cute valentine that the kids can use to "hang" artwork onto any magnetic surface - like the fridge.

Cost to me:
2 pkgs bags: $2
clothespins: $1
 (I only needed about 20 more - so 1 dollar tree pack...I had about 50-something in my craft drawers leftover, but this would have been about $2.50-$3 for the 100 pack from walmart...I think?)
paint: 79 cents
cardstock: in stash (free)
I already have lots of this - (but you can get a pack of 50 sheets for a couple dollars)
packaging tape: in stash (free)
again, we already have several rolls of this (last time we needed it, I could only find the multi-roll packs)
magnetic tape: $3.50 - which I'll probably use only a 1/5 of - the roll is huge and wide
(so 70 cents for this project, we'll say)
paper/ink: got it (free)

So total I spent this year, right now: less than $5 for 76 valentines that are cute.

(Yeah, I know - I'm kind of cheating on the cost - counting "free" stuff I have that was bought/paid for in the past, but counting only the portion I am using for things I had to buy a whole pack of right now...still less than $8 if I "charge the entire roll of magnetic tape to this account" :) and yes, it would have cost even more had I had none of these...but then I'd have done a different project.) :)

I just found a heart online so I didn't have to draw one over and over and I put it on a page a bunch of times to print out...for your convenience, you can use the one I put together:
jpg file:

or pdf:

for the message I typed up and "fonted" cute...you can print 4 to a page, 6 to a page, or 9 to a page, depending on the size you want the message to be. (I like the 9/page best - for space and for size):
3x3

or the word docx in case you want to edit it like you like it:
Message - word doc