Showing posts with label pattern. Show all posts

Tuesday, October 29, 2013

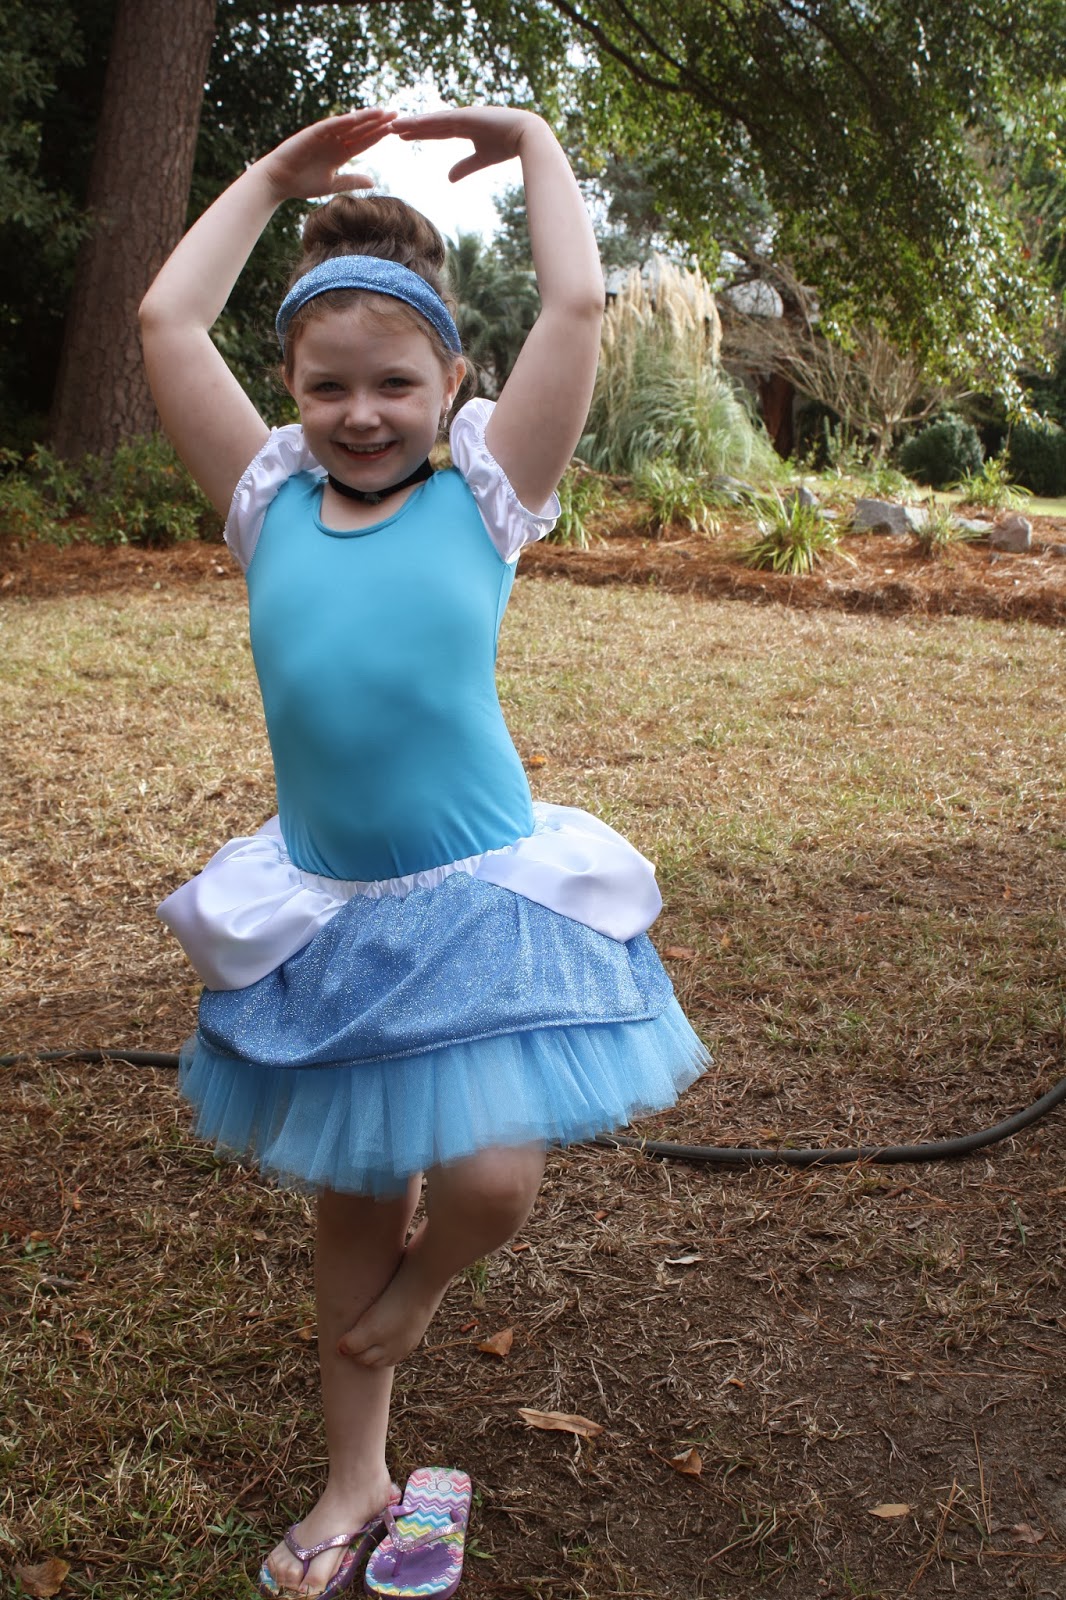
Halloween Costumes 2013: Cinderella as a Ballerina

When she said she wanted cinderella as a ballerina, she was actually looking at one of the tacky adult costumes that try to be "flirty" in a pattern book at JoAnn fabrics. (I was grateful that ballerina was how she perceived what that costume was!)

My second thought was, uh, can't you just wear the cinderella dress I made two years ago and stuff a tutu under it? I like to sew, but I like some variety. But I let her describe what she wanted, then designed my plan from there.

I wanted to try out making a leotard (since my girls need new ones and making leotards and swimsuits has interested me for years). And a tutu that is removable means that she's more likely to play dress up with it later even if she doesn't want to strip down enough to put on the leotard.

I used Kwik Sew 4011 and altered the pattern to be medium at the top, large at the bottom, and added an inch to the crotch length. (It was relatively easy to alter - one alteration led to the other naturally in tracing it.) Great pattern by the way. (If you have a leotard or one piece swimsuit, you could try tracing the front and back and adding a seam allowance. I wanted the pattern for other things so it was worth the cost of a kwik sew pattern.)

For the sleeves, I drew roughly the same shape of sleeve, but much larger (since I was using white costume satin and not a stretch fabric). I then gathered the sleeve top to fit into the arm opening and added elastic in the bottom to make it fit her arm and puff a bit. (Sleeve pattern below or in pdf and other half)

(that says right half but it should say left half on the pattern piece)

\
Print so the square is 1" and both sleeve halves match in size. Tape together.

For the tutu, I used this tutorial - really the best I've seen for a sewn tutu. (I'm not a huge fan of the knotted mess of tulle strips - unless of  course you don't sew - then I think they're a great alternative.) I used that tutorial for all  tutus.

I used 3/4" elastic, so I had to sew my waistband a little smaller, but other than that the only alterations were in adding my layers of white satin and this cool blue shimmery stuff I got for 69 cents a yard off the clearance table last week at Hancock Fabrics.

I sewed the gathered tulle to one side of waist band, but before sewing the 2nd strip of tulle to the other side of the waist band as the tutorial instructs, I made the white and blue layers of the tutu to add between the tulle and waist band so once flipped, they would be on top of all the tulle.


For the white "waist gathers" I call them, I cut 18" diameter circles, folded in half (wrong sides together) and basted around the raw edges. Then I gathered the edges I just basted together so that it was more of a straight line. I sewed this along the sides of the waist band.) I centered them 1/4 of the way from each end of the waist band. I sewed with the waist band up and the white satin on the bottom so that I could follow the stitching line referred to in the tutu tutorial above.

For the blue shimmery layer, I couldn't decide between a circle skirt style and a straight gathered skirt style, but eventually I decided it would be easier to go with option B. (I kind of wish I'd gone with option A)

I cut 2 strips and sewed them together to be at least as long as the waistband and 10" high (so that the tulle of the skirt would stick out).  I sewed this piece of fabric facing towards the white waist gathers, again, with this on the bottom and the waist band on top (as I did with the white) so that I could see my stitching line on the waist band and follow along it.

______________________________________________________________
{Had I chosen the first option of a circle skirt for the blue shimmery fabric, I planned to cut a circle skirt so the inner circle "waist" would be 53" so that it would fit to the waist band, and then when gathered would be full but flat above the tulle skirt. I planned to cut the circle through - like slicing into one side of a donut - so that I didn't have to worry about the fact that the waistband wasn't a circle until the last step.}

If you're interested in doing this version, I calculated to get a 52 or 53" inner circle and 10" long skirt before hem. 
First, Google a circle skirt tutorial. There are tons of good ones. Then... when you fold the fabric in quarters, your first measurement should be about 8.4" (round up is fine - just cut off what's leftover at the end of the waistband). The second measurement is another 10" away from the first. Hem the outermost circle. "Slice" the donut at one side straight through to center (but not all the way across donut). Then sew to waist band right side toward white waist gathers.

I kind of wish I had done this, but I do like the way my straight gathered skirt for the blue shimmery sort of pushes the tulle down a little. 
_______________________________________________________________________
After that I finished the tutu tutorial as per instructions.

....

For the headband, I used leftover blue shimmery and just folded a rectangle (narrower towards the ends)  so the raw edges were towards the underside  and topstitched along the two long folded sides, and sewed a piece of black 3/8" elastic into each end to wrap around the back of the head. (Little effort was made into making this perfect and it looks just great.) It was about 8" wide towards the middle and 2" wide towards the end - then folded. (Should have cut two pieces and seamed at edges to make it lie flat...oh well.) :) I was in a hurry by this point.

...

For the choker, I just sewed velcro onto the ends of a piece of black velvety trim (from the ribbon/trim section of JoAnn's) and sewed on a little blue crystal-y thing from who knows what that she found around the house.

And that's it. We'll add white tights and ballet shoes when we're ready to trick or treat!

See tinkerbell beside her in the above picture? I'll get to that costume next....

Monday, October 28, 2013

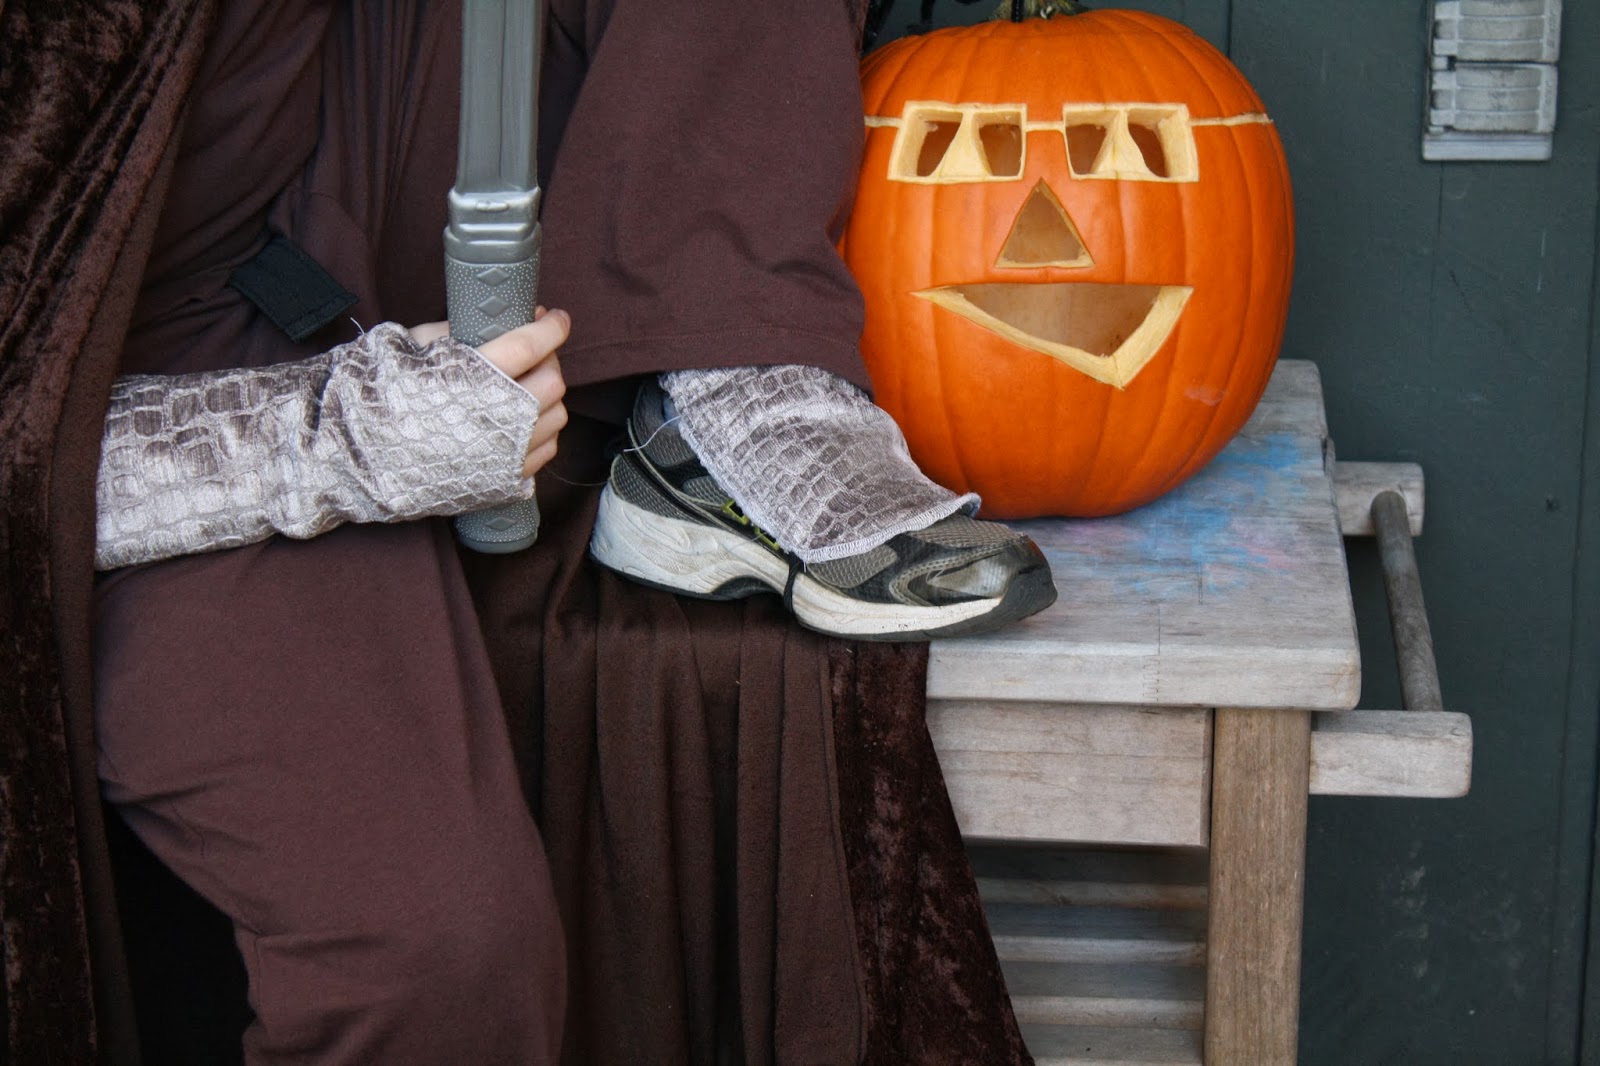
Halloween 2013: Medieval Hero Spy?

Yeah, I'm not sure what he is?

First - THE CAPE

He wanted a cape - with no sleeves but with a hood - a hood so big that it could hang in front of his face.
I made measurements, and a plan (making the cape part more like a piece of a circle), but then I found this video tutorial and went with their measurements and method. (In hind sight, I love how it looks, but with his nearly 11 year old size, I wish I had gone with at least my measurements for the hood portion.) Oh well - a costume piece he can wear for many years to come in many different imaginative ways!

She basically takes about 2 yards of fabric, folded in half (the way it came off the bolt), cuts 22" off one end. (This becomes the hood.) Then, on that 22" piece, she measures 17" from the fold and cuts perpendicular to the first cut (so that it's not the full width of fabric) - giving a 22" high by 34" wide (it was folded remember?)  piece of fabric for the hood. (The seam goes along the top of the head and the fold along the back of the head.)

She hems all raw edges of the hood and cape piece.

The remaining fabric is left as is or cut shorter if desired. Then the top edge (where the cut was made to separate the 22" high piece from the rest of the fabric) is gathered until it is the same width as the hood when opened flat. they are sewn together (right sides together) and then it's done. Rather than adding some closure or broach (like my son wants a broach on his cape), he just wanted me to overlap the area in front of the neck/chest and sew it together. It's plenty big enough to fit over his head.


Next - THE WRIST GUARDS
So then he wanted these things he described and I've decided upon looking around to call wrist guards. But he wanted his thumb to stick out the side.

I happened to get this really cool fabric from my mom (who was given it by some spouse or boyfriend of some co-worker of hers - he sells or distributes fabric to stores...?? Who knows - but I got about half a dozen 1 yard pieces of random decorator heavy type fabrics.) One of the pieces we think looks like scales or metal things...perfect! (I didn't have enough plain white broadcloth lying around, but I did have the bottom portion of my brother's khaki pants that got turned into shorts earlier this year - so that's what they're lined with. I did have to go buy more velcro though. (Could have just sewn them together - he doesn't even need to unvelcro it to get his arm in.)

The pattern for that I tried a few times until I got what I wanted and easy. I didn't re-draw it after I decided to straighten the lower side edges, but I did draw a straight line so you could see the better way to cut it.
 (I know there's a ton of overlap, but I wanted it to be full 8 1/2 by 11 size so that the printer didn't scale it in any way. Plus, it'll make it easier to tape back together.) or PDFs of that: whole, half, other half


Just cut out 2 of your outer fabric and 2 of your lining (make sure to flip the pattern over for the 2nd one or you'll end up with two of the same hand!)

Right sides together - 1 lining, 1 outer fabric - sew all the way around, leaving an opening at the bottom of the piece for turning. Clip all outer corners, snip into all inner corners...flip right side out. You'll have to poke all those corners to get them just right (especially if you have really thick outer fabric and pretty sturdy lining like I did!) One you have it looking right, top stitch around entire thing, ending with the opening (sewing it shut - save this for last in case you have to poke out a corner you missed).

Overlap the parts that go above the thumbs (I did the top of the hand toward the palm) and stitch it in place. (This is a little tricky to keep aligned while keeping other parts out of the way, but it only takes about 1/2" worth of stitching to close it off.)

Then, sew on a strip of velcro onto the sides to close that part of the overlap where it wraps around the arm.


Just for reference (in case you want to know how this size compares to your little medieval hero), here are his arm measurements:
After that he wanted EYE MASK
Our church trunk or treat doesn't do masks (not sure if it's because it hides people's identity or because most of them are creepy or just because it would scare the little kids - whatever the case, I'm glad - I dislike full on masks for all of those reasons)...but a small around the eyes thing...(I hope) is ok. Because now he's got one. I liked her eye mask but I decided to just go with the general idea and make my own since he wanted a slightly different shape. And his face was bigger.

Here's my pattern (I used fabric from the scrap box - it frays, so I couldn't just sew around the edges.)
I should have just done a satin (close zig zag) stitch all around the edges, but I didn't want any more raw edges than necessary, so instead, here's what I did:

 I cut out the pattern pieces (2 layers) and put them right sides together. On one side, I sandwiched the end of 3/8" black elastic into the side. I started sewing at the other side, going all the way around and leaving a hole on that side for turning. Clip (make little snips) all the way around to make the curves not pucker. Flip and flatten. Top stitch all the way around (leave hole for just a bit). Dry fit on the head and stretch the elastic comfortably (cut it with an extra 1/2" to stick into opening in side of mask). Insert the end of elastic into opening, fold in raw edges and top stitch closed.

For the eye holes, I did a simple stitch around where the eye holes would be cut before cutting them. Then, I just just inside that stitching line. (It helped to keep the two layers together and because the fabric was stretchy made sure my eye holes stayed straight and not go crooked when I tried to cut them.)
Then, satin stitch with a narrow stitch width around the holes. (On my singer, the stitch length was 2 and the stitch width was 4)

They're not perfect - a satin stitch around curves was a little bumpy, but going slow I think it turned out good enough. (Let the zig zag go off the edge of the fabric and it'll give it a finished look and not little threads poking in towards the eyes.


Last, were the KNEE PADS...which turned into SHOE COVERS?
He brought these old things from the dress up box I think I picked up from some "blessing or burden party" (where a bunch of friends gets together with things that are burdening our house and which may bless someone else - like a free yardsale.)

 The elastic was worn out on all but 1 piece - I used that as a scale for replacing the rest - but he thinks they were elbow pads - probably were since they seemed a little tight on the knees.

Anyways - I just traced some more of the fake-metal fabric and serged it right onto the front of the old knee/elbow pads. (which left the padding on the back).


Then, I sewed the elastic onto the front and flipped it towards the back.

Ta Da - shoe covers!

And he's done...

I also made the shirt and pants. (I know, awesome right? I'm just barely learning to sew with knits.)
The shirt, I traced a shirt he has and added seam allowances and used a tutorial for the neckband.
The pants, I used a pattern that had a pair of pants and I added pockets to the pants - because my almost 11 year old thinks all clothing should have pockets!

I made up a pocket shape (I should have turned it upside down from the way I have it but it's fine). I put my measurements in case you wanted a general idea of my starting size.


Each pocket piece (there are 4 total - 2 for each pocket) gets placed right sides together with the pant leg. (I went about 3" down from top of pants - farther is fine, higher might conflict with waist band.)

 Both pocket pieces pinned to front and back leg sections (right pocket already sewn in place)

pocket section attached (pant leg folded apart from matching front to show both pocket sections)

Then unfold it out flat.


Once all 4 (front & back of left & right) are sewn with pockets, align the left front and back pant leg pieces with the pocket halves on top of each other. You'll sew all the way around from waist, around pocket and down side of leg to ankle.


Then, I sewed along the leg seam the bottom (3", I think) of the pocket so that it closed it off created a pool of space below the opening of the pocket.


Thursday, February 7, 2013

Pattern: Dart Gun Holster

MAKING THE PATTERN
This is a post to aid in the dart gun holster - I made instructions on how to make one and posted my patterns, but in case they don't fit and you need to make your own - here's how I did it.


I tried 2 versions this time around, one where I crinkled the paper around the gun and made pin holes to mark where it met itself so make a more contoured holster. Not worth the aggravation to make/use.

Then, after making the pattern I decided I wanted it less contoured - it would fit changing guns and I thought the gun would slip in/out more easily, so this tutorial is more mathematical and less paper bending. :)

Disclaimer - this is not officially how you make a pattern for this or anything else...this is more of me letting you in my sewing area to watch me make a pattern...and fix it.

DIRECTIONS:
Get a big sheet of paper - I used a roll of my kids' easel paper. (tissue paper, opened up large brown paper sack, taped together computer paper, whatever you have around the house...I've used all of those for patterns.)


Place the gun about 3" from the short edge and about 1" from the long edge. (Give some space beyond the gun and you can cut off the excess.)
{In hindsight, I would go about 8" from the short edge to leave room for the belt loop/casing}

Mark where top of gun is. Draw a straight line across (move the gun first). We'll call this "line A" for the rest of the pattern.

 Measure width of gun (from top)
Mine's 3"

Measure 3" up from first line (at top of gun) - draw another line. (This will be line B.)
Measure from the bottom of paper to line A. (Mine was about 6.5")

Above line B - draw another line (parallel to line B) the distance away that you just measured (for me, 6.5")
Your pattern should look a little more symmetrical.

 (You don't really have to do this step b/c you're going to fold it in half to do the cutting, but you just need to make sure you have that much space before you cut and realize you're short. If you are short...now's the time to tape some paper together!)

Make sure the dart gun is back in place.
Then draw an outline around the dart gun (it doesn't have to be perfect...just where the holster would ideally be.) You can keep it close - you've got the 3" margin for the thickness above the gun accounted for already.

 Draw another curved line to match this one 1/2" away - this is a seam allowance.
Also, draw a midline (between line A and line B) - so that the 3" margin for the gun's thickness gets split in two. (This is so you can tell where to fold it in half.)

 Fold it in half and cut along that outer curved line.


Lay the gun back on top of your partially-made pattern and mark where the trigger spot is...this is about where you want the bottom of your opening so that you can 'grab and go' when that stuffed animal wolf sneaks up behind you.
{In hindsight, I probably would have made this a little higher...just so the gun was a little more protected.}


Curve this line into an arc, ending at line A.


In case I used this pattern for an unlined holster, I traced the curve to the other half to cut out there, but you could keep it where it is and just flip the pattern over...or if it's always lined, it doesn't matter b/c you'll have two identical mirror image pieces of fabric.

Cut along this curve through to the top of the paper.
{In hindsight - continue that cut all the way through to the top...I just didn't rephotograph after I realized I needed to keep cutting.)

Your pattern is mostly done...we just need to add something for the belt to go through.
{Another hindsight comment, yes...I didn't leave enough space at the side of my paper where the top of the holster pattern is, so I had to add some.}

I wanted it to hang at a slight angle (last time I didn't - my mavarick gun pattern hangs down straight).
The math-y part of this, you'll need a ruler like this one for. If you don't care so much about what angle you're making, just use any ruler.

If math doesn't scare you, stick with me...
Lay the grid ruler on top of the line...hm, we didn't name this one - it's the line that is perpendicular to line A and line B - it was on the right side of the paper, but is now the top of the holster pattern. We'll call it C from now on.
Center the 30 degree line of the ruler over line C. (There is a 30 degree line on either side of the center of the ruler, so make sure the ruler is aimed like this one so that your holster will hang right.)


Draw another line a few inches over, parallel to the first. (You can use any rectangular object that is the width you want your casing at the top of the holster to be - align it with the first line you drew, then trace along the opposite side of your object - you'll have 2 parallel lines spaced like you want them.)
Here is a full shot so you can see the direction of the lines.
 Don't cut anything yet.

 I had to tape some more paper to the back of mine behind the sets of lines I just drew to extend the length.
To make it easier, I went ahead and decided the size of my casing (at least 1" for the belt) - 1 1/2", then added a seam allowance (1/2").
Since it's folded in half, that number should double - to 4".
I cut out a piece of paper the size I wanted in width by the 4" I needed in height, and then folded it in half (where it would fold once I sewed the holster). I taped it on the back to align with where I wanted the "top" of my holster to be.


 Then, I turned it over and cut off the excess from the original pattern.
I also folded over the casing and cut it in a more contoured shape (notice the curve on the right of the fold over belt casing.)


One other edit I had to make later as I was sewing...
I found those little curve around the trigger spots were impossible to sew around easily and flip and etc...so just cut them off. It's all better. Trust me. (and ignore that stain on my carpet that is twice as dark in this picture as in real life...should have photoshopped that out)

That's how I did it. Good luck making yours.

I'll post my scanned/photographed and sized to print pattern as a link on the holster instructions page.