If you saw the last post, you saw our new curtains I made (left of the blue couch in the first picture) - and you probably noticed the black/green w/ red accent theme.
Well, after looking around a bit for a small futon/couch or some kind of sitting for the 'entertainment' area of the room, we finally found the perfect one - in size, in function, in price...but not in color.
Because I don't like loose gathered, stuffed in the seat and tied down, hanging slip covers you pay lots of money for at the store...and because it was such an odd (but perfect for us) size, I decided to make one.
So, added to my list - slip cover.
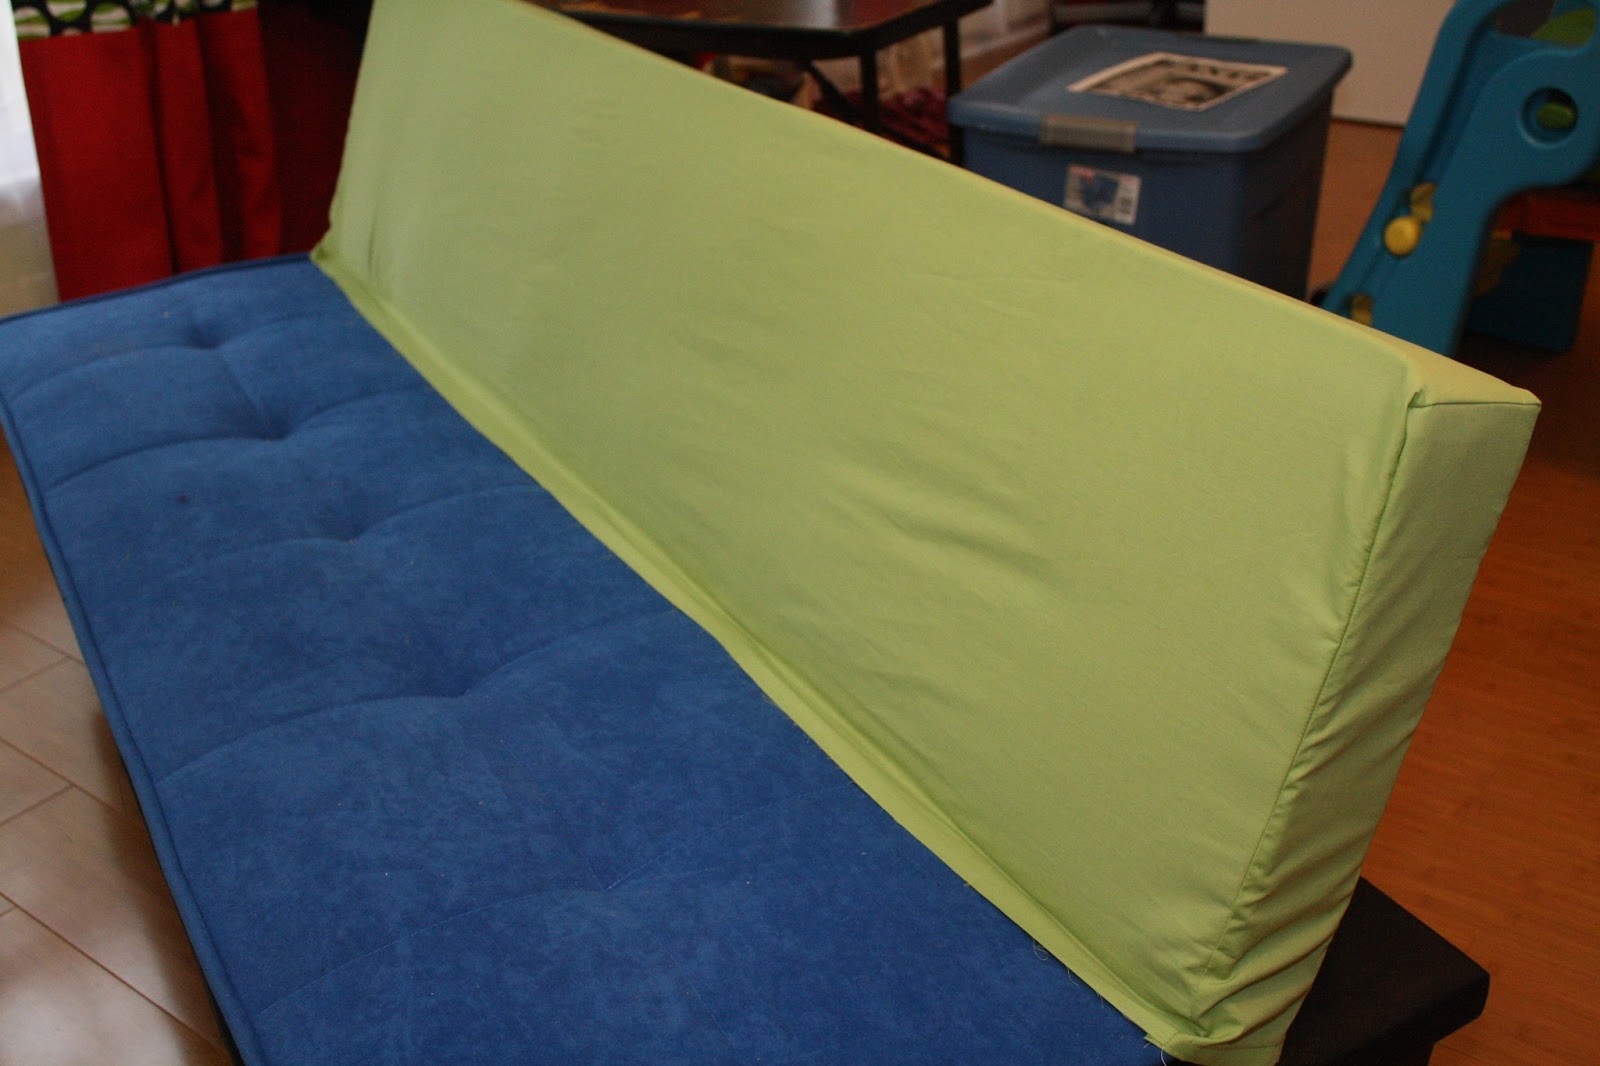
I used a king sized sheet from walmart ($15).


And this is how it turned out:
I doubt anyone needs a tutorial b/c what's the chance you got the same little futon and want to slip cover it??
But just so you can see my overall idea, I'll toss at you a quick picture walk through of what I did - who knows? Maybe something I did will help you out in some way!
Step 1 - the prep
Tip: Use top sheet hem for back of couch where it needed to be hemmed anyways and some other narrow hem (like side or bottom of sheet) go used for the bottom edges of the side pieces for the same reason.
Because I wanted a continuous piece over the back and the sides sewn on like a box (or upside down bag) - I had to do a little tricky sewing here - it's not too hard.
You basically sew the first side (both corners aligned, right sides together).When you near the end of the first side, you stop 1/2" from edge, and leaving the needle in the fabrics, turn - but you want to take the long continuous piece and turn it with you while the other (side piece) stays put. To do that, you need to make a little snip in the continuous piece towards the seam so you can yank that piece to align with the next side.
The pictures might help...
In case you need to see that one more time....
Stop 1/2" from edge, clip continuous piece
(one side it will be the bottom fabric and one side it will be the top fabric if you start sewing on both sides at the hemmed back edge)
Leave needle in, turn
Pull continuous piece (here it's the top fabric) to align edges
(since you snipped into it, it should cooperate with you)
and finish that all the way around 3 sides of that side piece
So it looks like this:
Does it fit?
Yep, next side.
Because I measured loosely and this is thin cotton, I stretch the fabric taut and measured how much to trim off so I'd be left with only 1/2" extra on the opposite end before sewing that side on like the first.
(and turn just like first side piece, this time taking the bottom with you)
Fit??
YEP...
Stuff in the excess into the 'crack' (where back meets seat)
Measure all along where 1/2" is...
...and trim off excess
I folded the couch back piece (the one we've been working on) in half to find the center.
I folded the couch seat piece in half to find the center.
I matched these centers with right sides together and pinned edges aligned until I got to the sides.
(I did this because there is excess to cover the sides of the seat and I didn't feel like doing the math to figure out how much to leave. Sometimes math isn't faster.)
I sewed the slipcover together along where the 'crack' of the couch is (this is what I call where the seat and back meet where you lose all your change, phone, hairclips, and pens in a typical couch.) :)
It kept having issues...then I stopped to deal with them...
drat!
ALL CLEAN...and finish that piece.
Dry fit - but inside out - this next piece is also easier done without the math
(Take out the pins carefully, so you can still see where the pinholes are and mark along this line - keep corner folded and use 45 degree on guide to make it 'perfect')
Fold edge of seat (where it hangs at side of couch) 1/2" hem.
I folded up bottom 1/4" twice to make a casing for 1/8" elastic around bottom (side, front, side) of seat piece - like a fitted sheet
to keep back secure, I took 1/2" elastic (43" - the back is 75" from side to side of slip cover around back)
I sewed a 'strap' or tube of fabric (I used leftover curtain fabric - which was really sturdy and tough and took FOREVER to turn right side out...If I did it again, I would fold the long edges in and fold in half and top stitch all the way down and skip the method I did!
I inserted the elastic into the casing/tube and sewed it in to each end, which I then sewed to where back piece meets seat piece.
I pulled the seat piece to cover raw edge and sewed in place
See the little sideways stitch above the elastic strap??
I found that....
it's tight and I don't want any tears from putting it on/taking it off too quickly - this is a walmart sheet afterall! - so I did sew one extra little stitch to help keep the stress of the seam to a minimum.
then, I sewed a piece of sew-on velcro to the seat piece - as close to the back as possible.
time to put it on...
Slowly
Back fits...
Stretch the front seat over...
Tuck the seam into the crack...
Add a sticky vecro to match the sew-on and stick it to the side of the couch...
And VOILA! blue couch transformed!
So, our finished entertainment area:
Next...art area
If you have an questions, comments, or other, leave me a note!