Today I'm posting a cute idea - and there's still time before Easter for this quick project!
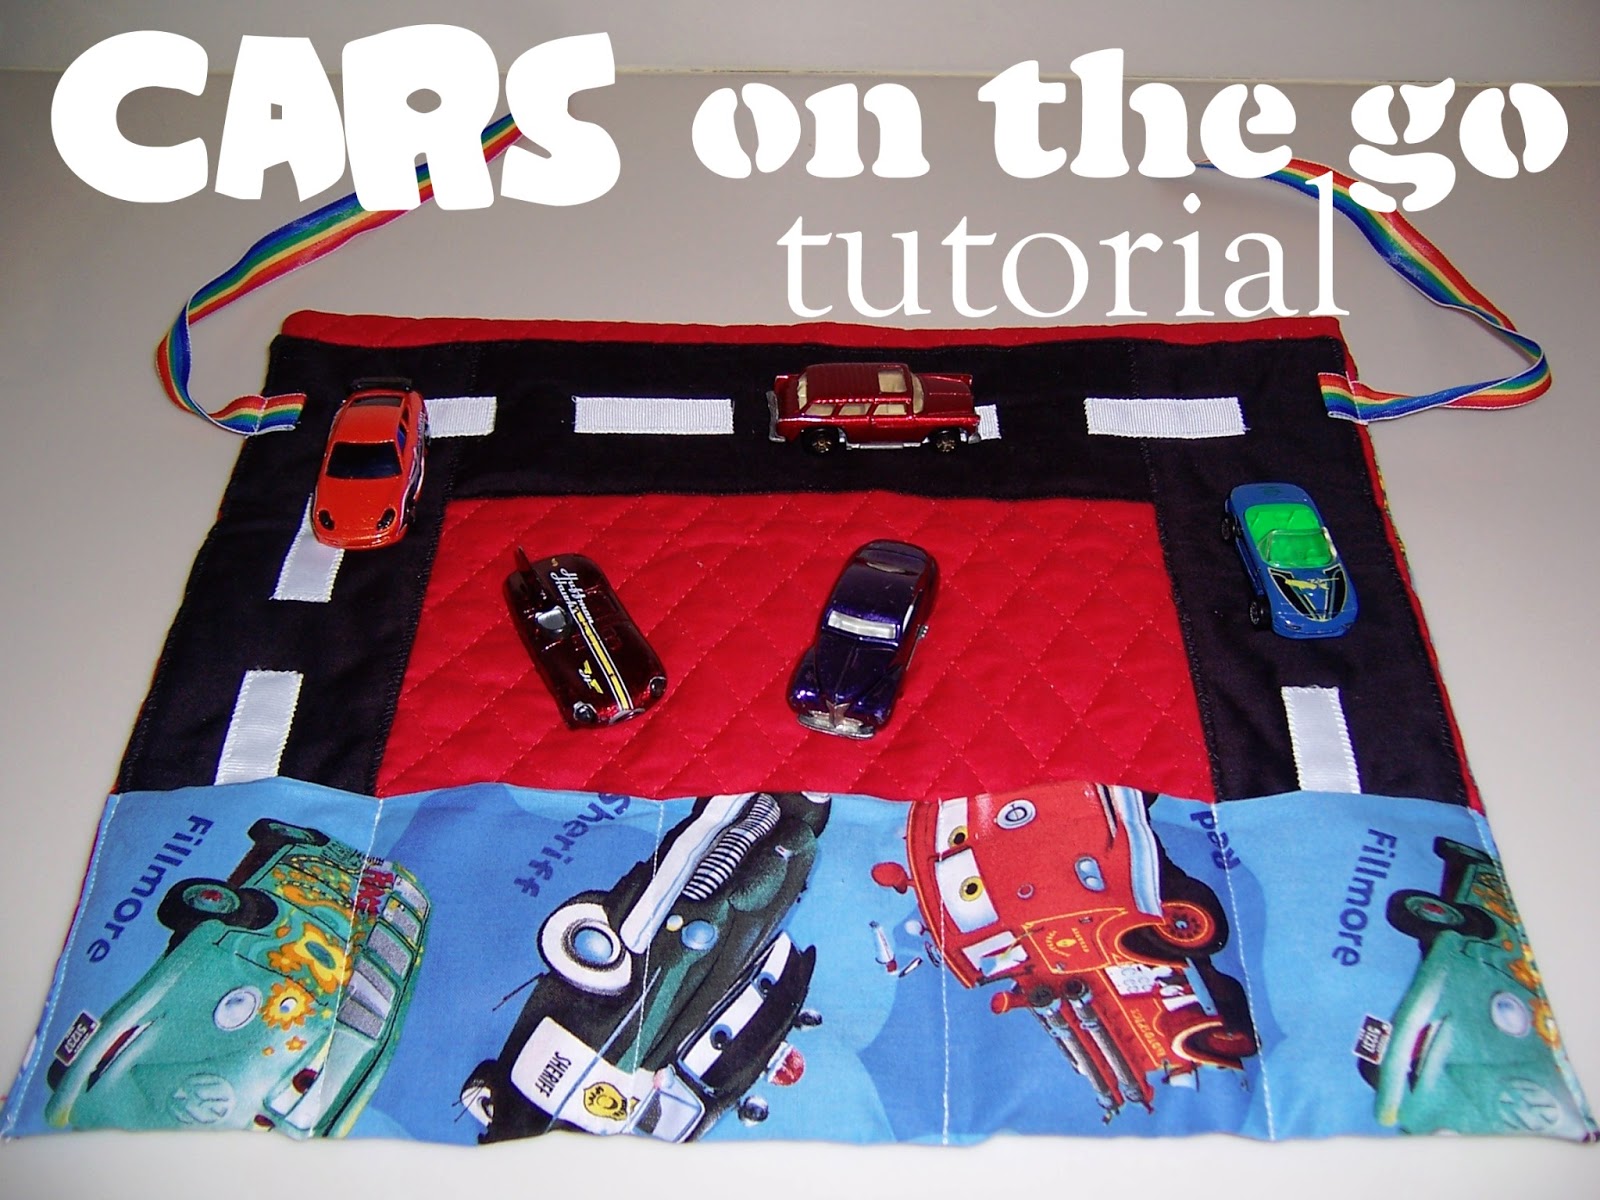
This isn't my great idea for a project, but from my mom. :) She made this for my nephew (her grandson) for a quiet toy. Perfect for any boy who loves cars and can be entertained by them for a while - and it wraps up neatly to fit right in your bag.
untie it and open it flat...


Unroll it...

and play!


I love the little "garage pockets" for the cars to "park" when it's time to roll it up and clean up!
Here's how to make it:
Materials:
1/2 yard print fabric (Cars fabric here)
1/2 yard quilt fabric (red fabric here)
1/2 yard black fabric
Grosgrain ribbon- 5/8 inch white
Grosgrain ribbon 5/8 inch colored for ties
thread (black and white)
Directions:
Cut quilt fabric 13 inches by 16 inches

Cut print fabric 21 inches by 16 inches ( I cut the 16 inch edge on the selvage - this avoids having to finish the edge inside the car pockets)

Cut black fabric:
(2) 7 inch by 9 inch
(1) 7 inch by 11 inch

Cut white ribbon in 2 inch strips (these will be for the 'lines' on the road)


Fold black fabric in half right sides together, and stitch 1/2 inch seam allowance, leaving 1 side open. Turn and iron flat.


(raw edges will be covered when we sew the road on)
Pin on to right side of quilt fabric. 1/2 inch in from edge of fabric on sides and top, put raw edge side under finished edge as you pin around. Sew down on quilt fabric. (A zig zag stitch will provide the best security)


road sewn down:

back of fabric:

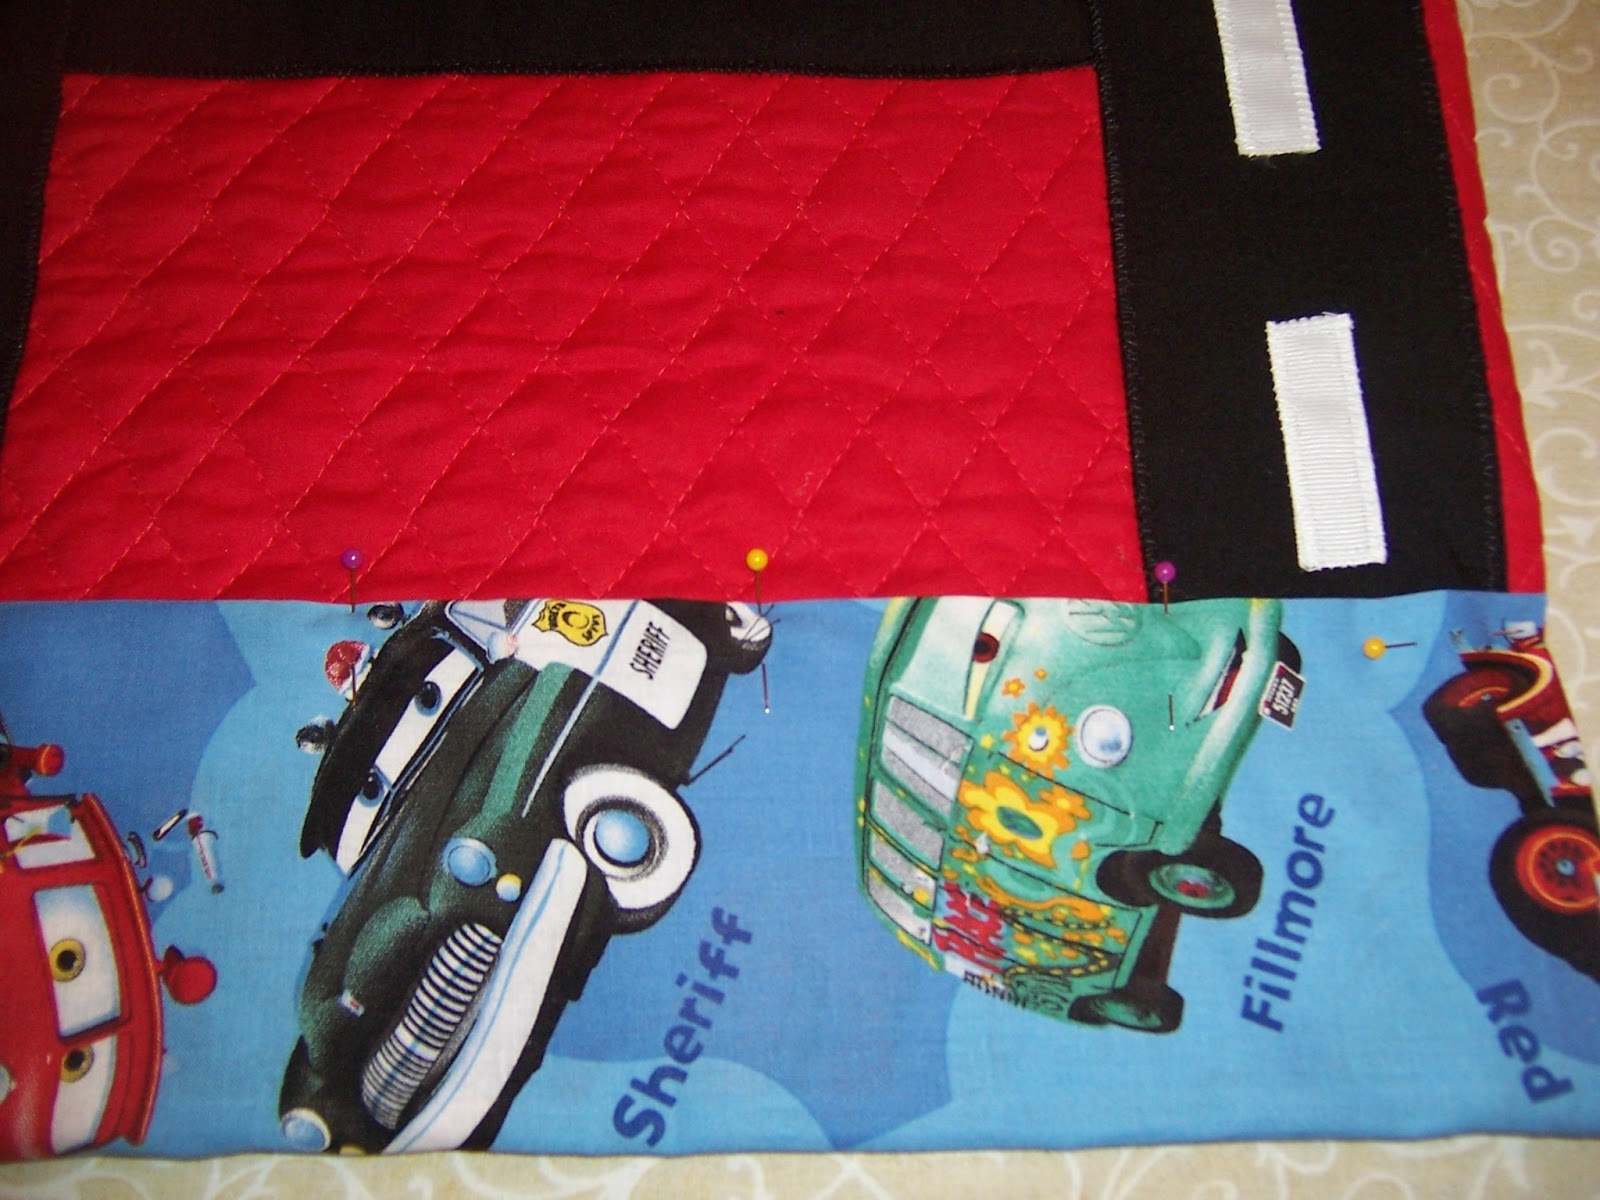
Place white ribbon strips in middle of black fabric for road lines. Use tiny zigzag stitch to sew down strips.


Fold print fabric up 4 inches, wrong sides together. Iron in place/ pin in place. (This will be for the outer part of the car pockets later - it will be folded up again to complete the pocket.)
*If you cut your 16" side along a selvage, this is where you want the selvage to be used.
*If you cut your 16" side along a selvage, this is where you want the selvage to be used.


Put right sides of print and quilt fabric together- the folded edge of print fabric will be longer at bottom.
(Road is the right side of quilted fabric - the long side of quilted fabric that does not have a road piece should be positioned towards the extra of the print fabric.)
Sew from edge where folded piece meets quilted edge sew up one side, across top and back around to where folded up edge meets bottom of quilt fabric.

Clip corners (get ready to turn right side out)

Turn to right side. (Fabric extension showing, road section is hanging off opposite edge of ironing board)
The print fabric extension should naturally fold along the sides where the seam allowance continues toward the selvage of this piece (see picture below)


Flip up print 4 inch piece again onto the bottom edge of quilted fabric. (This creates the pocket for the cars)

Pin every three inches, and sew along side edges and at where the pins mark to create pockets for cars.

Sew colored ribbon on each edge for tying up car mat for storage.


No comments:
Post a Comment