
First - THE CAPE
He wanted a cape - with no sleeves but with a hood - a hood so big that it could hang in front of his face.
I made measurements, and a plan (making the cape part more like a piece of a circle), but then I found this video tutorial and went with their measurements and method. (In hind sight, I love how it looks, but with his nearly 11 year old size, I wish I had gone with at least my measurements for the hood portion.) Oh well - a costume piece he can wear for many years to come in many different imaginative ways!
She basically takes about 2 yards of fabric, folded in half (the way it came off the bolt), cuts 22" off one end. (This becomes the hood.) Then, on that 22" piece, she measures 17" from the fold and cuts perpendicular to the first cut (so that it's not the full width of fabric) - giving a 22" high by 34" wide (it was folded remember?) piece of fabric for the hood. (The seam goes along the top of the head and the fold along the back of the head.)
She hems all raw edges of the hood and cape piece.
The remaining fabric is left as is or cut shorter if desired. Then the top edge (where the cut was made to separate the 22" high piece from the rest of the fabric) is gathered until it is the same width as the hood when opened flat. they are sewn together (right sides together) and then it's done. Rather than adding some closure or broach (like my son wants a broach on his cape), he just wanted me to overlap the area in front of the neck/chest and sew it together. It's plenty big enough to fit over his head.


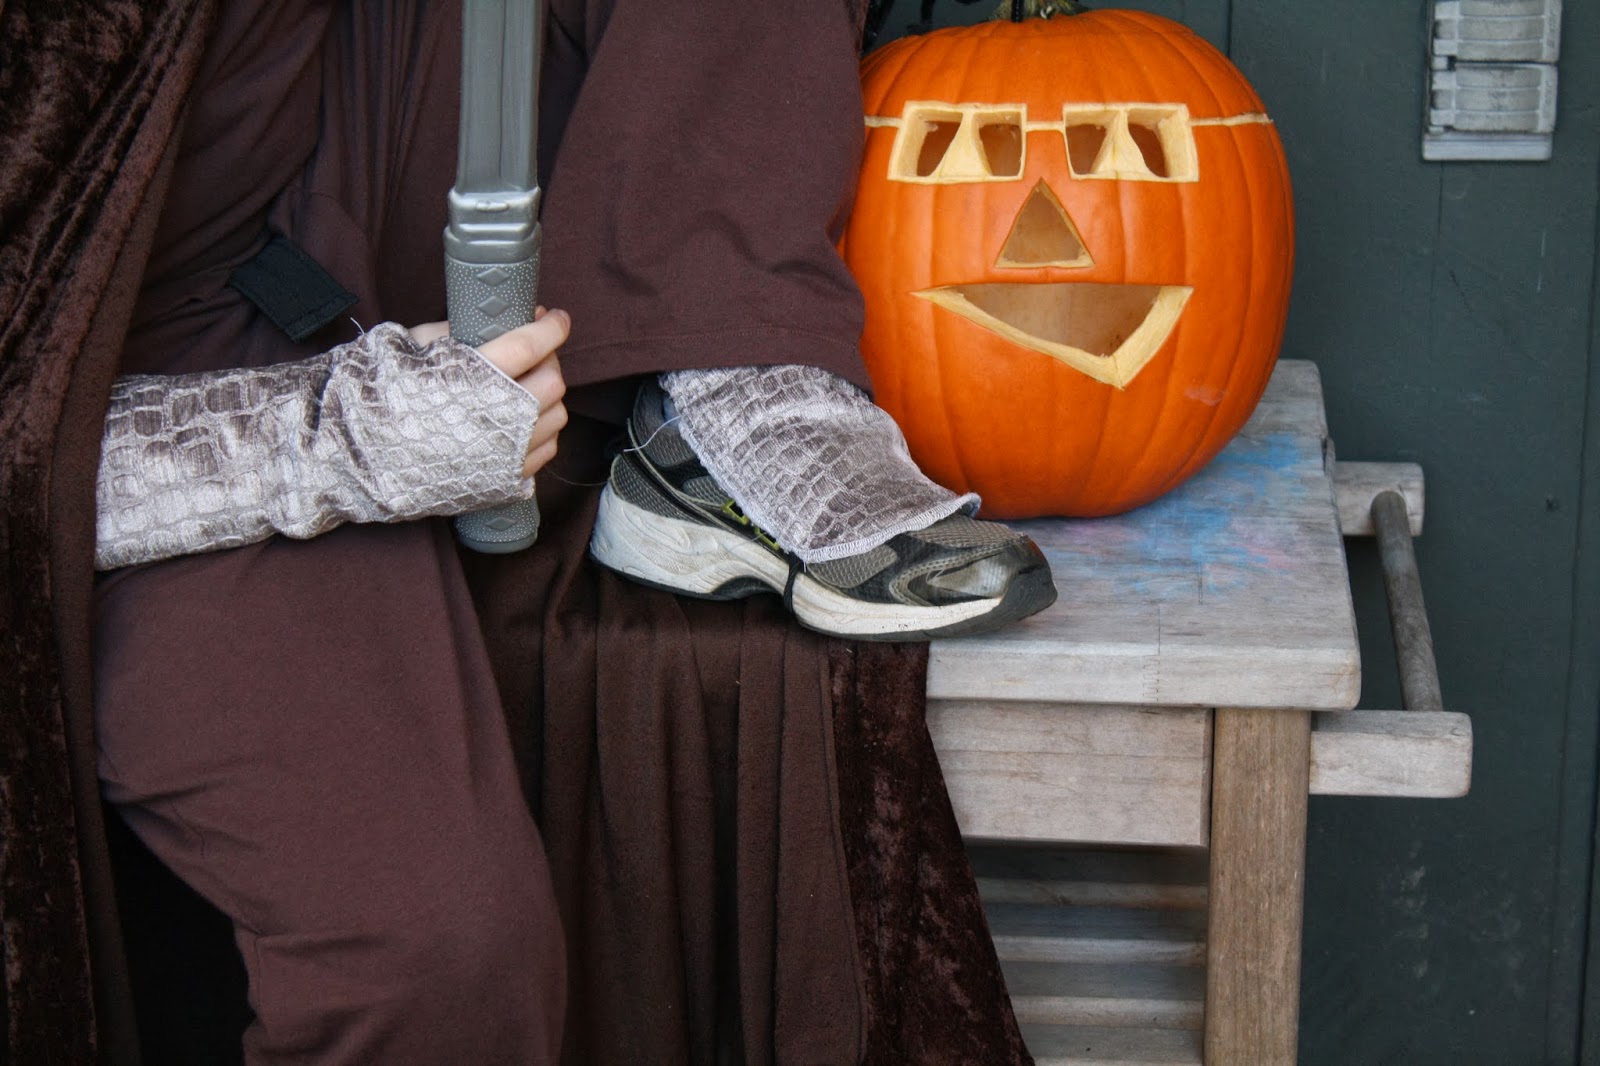
Next - THE WRIST GUARDS
So then he wanted these things he described and I've decided upon looking around to call wrist guards. But he wanted his thumb to stick out the side.
I happened to get this really cool fabric from my mom (who was given it by some spouse or boyfriend of some co-worker of hers - he sells or distributes fabric to stores...?? Who knows - but I got about half a dozen 1 yard pieces of random decorator heavy type fabrics.) One of the pieces we think looks like scales or metal things...perfect! (I didn't have enough plain white broadcloth lying around, but I did have the bottom portion of my brother's khaki pants that got turned into shorts earlier this year - so that's what they're lined with. I did have to go buy more velcro though. (Could have just sewn them together - he doesn't even need to unvelcro it to get his arm in.)
The pattern for that I tried a few times until I got what I wanted and easy. I didn't re-draw it after I decided to straighten the lower side edges, but I did draw a straight line so you could see the better way to cut it.
(I know there's a ton of overlap, but I wanted it to be full 8 1/2 by 11 size so that the printer didn't scale it in any way. Plus, it'll make it easier to tape back together.) or PDFs of that: whole, half, other half


Just cut out 2 of your outer fabric and 2 of your lining (make sure to flip the pattern over for the 2nd one or you'll end up with two of the same hand!)

Overlap the parts that go above the thumbs (I did the top of the hand toward the palm) and stitch it in place. (This is a little tricky to keep aligned while keeping other parts out of the way, but it only takes about 1/2" worth of stitching to close it off.)
Then, sew on a strip of velcro onto the sides to close that part of the overlap where it wraps around the arm.


Just for reference (in case you want to know how this size compares to your little medieval hero), here are his arm measurements:

Our church trunk or treat doesn't do masks (not sure if it's because it hides people's identity or because most of them are creepy or just because it would scare the little kids - whatever the case, I'm glad - I dislike full on masks for all of those reasons)...but a small around the eyes thing...(I hope) is ok. Because now he's got one. I liked her eye mask but I decided to just go with the general idea and make my own since he wanted a slightly different shape. And his face was bigger.
Here's my pattern (I used fabric from the scrap box - it frays, so I couldn't just sew around the edges.)

I cut out the pattern pieces (2 layers) and put them right sides together. On one side, I sandwiched the end of 3/8" black elastic into the side. I started sewing at the other side, going all the way around and leaving a hole on that side for turning. Clip (make little snips) all the way around to make the curves not pucker. Flip and flatten. Top stitch all the way around (leave hole for just a bit). Dry fit on the head and stretch the elastic comfortably (cut it with an extra 1/2" to stick into opening in side of mask). Insert the end of elastic into opening, fold in raw edges and top stitch closed.
For the eye holes, I did a simple stitch around where the eye holes would be cut before cutting them. Then, I just just inside that stitching line. (It helped to keep the two layers together and because the fabric was stretchy made sure my eye holes stayed straight and not go crooked when I tried to cut them.)
Then, satin stitch with a narrow stitch width around the holes. (On my singer, the stitch length was 2 and the stitch width was 4)
They're not perfect - a satin stitch around curves was a little bumpy, but going slow I think it turned out good enough. (Let the zig zag go off the edge of the fabric and it'll give it a finished look and not little threads poking in towards the eyes.

Last, were the KNEE PADS...which turned into SHOE COVERS?
He brought these old things from the dress up box I think I picked up from some "blessing or burden party" (where a bunch of friends gets together with things that are burdening our house and which may bless someone else - like a free yardsale.)


Anyways - I just traced some more of the fake-metal fabric and serged it right onto the front of the old knee/elbow pads. (which left the padding on the back).

Then, I sewed the elastic onto the front and flipped it towards the back.

Ta Da - shoe covers!
And he's done...
I also made the shirt and pants. (I know, awesome right? I'm just barely learning to sew with knits.)
The shirt, I traced a shirt he has and added seam allowances and used a tutorial for the neckband.
The pants, I used a pattern that had a pair of pants and I added pockets to the pants - because my almost 11 year old thinks all clothing should have pockets!
I made up a pocket shape (I should have turned it upside down from the way I have it but it's fine). I put my measurements in case you wanted a general idea of my starting size.


Each pocket piece (there are 4 total - 2 for each pocket) gets placed right sides together with the pant leg. (I went about 3" down from top of pants - farther is fine, higher might conflict with waist band.)

Both pocket pieces pinned to front and back leg sections (right pocket already sewn in place)

pocket section attached (pant leg folded apart from matching front to show both pocket sections)

Then unfold it out flat.


Once all 4 (front & back of left & right) are sewn with pockets, align the left front and back pant leg pieces with the pocket halves on top of each other. You'll sew all the way around from waist, around pocket and down side of leg to ankle.

Then, I sewed along the leg seam the bottom (3", I think) of the pocket so that it closed it off created a pool of space below the opening of the pocket.

No comments:
Post a Comment